Showing posts with label basil. Show all posts

Thursday, June 7, 2012

Lemon Basil Penne


Oh this was so good.  Simple to make too. Serve along side some thin grilled cutlets for a quick weeknight meal!

Ingredients

  • 3 lemons, juice (and zest of 2)
  • 1 cup of cheese- I used pecorino, but you could use parm or even mozzarella
  • 2 garlic cloves, minced
  • 2 tbsp of butter (I used I can't believe it's not butter)
  • 1/2 cup of low fat milk (I used 1%)
  • 1 tsp of cornstarch
  • about 1 lb of asparagus
  • about 20 basil leaves, chiffonade (aka cut into ribbons)*
  • salt and pepper
  • 1 lb box of penne pasta (using whole wheat is even better!)
Directions

  1. Get water boiling for your pasta.
  2. In a small sauce pot add the butter and the garlic.  Cook that on low for a couple minutes to let the butter infuse with the garlic flavor.
  3. Then add the lemon juice and zest. (Note: the garlic may turn green/blueish color- don't worry it is just reacting to the acid in the juice)
  4. Side note: Never let this sauce come to a boil
  5. While the lemon juice is heating through add the tsp of cornstarch to your low fat milk- if you are using cream or whole milk this step is unnecessary.  Stir until combined and then add to the pot while whisking. 
  6. Quickly add the cheese and whisk until combined.  Taste it- see if you want to add more salt, add pepper if desired.  When that is all heated through and a creamy sauce consistency, turn off the heat and cover to keep warm.
  7. When the water boils add salt and then your pasta. 
  8. Cut your asparagus into short pieces, similar to the size of the penne.  When the pasta is almost done add the asparagus to the water and let the pasta and asparagus finishing cooking together.
  9. Drain pasta/asparagus and add to a large serving bowl.  Pour the sauce on top and add basil- mix until everything is combined.
  10. You can add a bit of extra virgin olive oil and more cheese on top if desired.
*To chiffonade basil stack up all the leaves and roll them up into a little log.  Then slice.  You will end up with pretty ribbons.

Tuesday, January 10, 2012

DIY Italian Bistro Lunch & Cocktails


So to celebrate my Mom's 39th birthday (again) she wanted some Italian themed food.  I like when the whole family comes to our house instead of going out- we can relax, stay as late as you want, drink as much as you want and most importantly watch the Giants game ;)  There are 6 of us usually and they come with the booze and I'll cook up the meal- having a great time + saving money + everyone pitching in = a normal family gathering for us.

My mom is a bruschetta fanatic- it is always a must have.  So to change it up I made homemade focaccia bread instead of just regular Italian bread- which came out perfect and is oh so good.  Here's the menu run down:

Appetizer

Homemade Focaccia with Bruschetta
Romaine and Fennel Salad
Raspberry Bellinis

Main Lunch

Paninis!
Caprese- Homemade pesto, mozzarella and tomatoes on Italian artisan bread
Proscuitto, arugula, and provolone on roasted garlic artisan bread
Genoa Salami, hot capicola, homemade roasted red peppers, provolone and arugula on whole wheat artisan bread

The last panini combo was the favorite!

Dessert

(Healthy) Lemon Semifreddo with raspberry and almond topping


Wow- this seems like such a lot of work when I actually typed it out! But it really wasn't- just some good planning and prep can make your party easy and enjoyable.

First things first: food shopping the day before.  I basically made the deli counter lady crazy.  I ordered all the meat and cheese pre-sliced so all I needed to do was put on the bread and fry.  I also picked up frozen bags of raspberries because they were on sale and of course all the other fresh ingredients I needed.

When I got home from food shopping I made the pesto, roasted red peppers (you can also just pick up a jar of them no biggie), and the lemon semifreddo.  By the way, semifreddo is like an Italian sherbet.

Fast forward to the day of- I made the focaccia in the morning (which you could have done the night before but I wanted it super fresh and it made the house smell wonderful), pureed the raspberries in the blender, and made the bruschetta (which could also have been made in advance).  When we were all done with the appetizers I just assembled the sandwiches and fried them up. Simple!

So the focaccia recipe is again Anne Burrell's but I this time I used a bit less flour and a bit more yeast.  Can't deny the fact that this is a great simple recipe.


Then you slice the small squares again through the middle and make a small little bruschetta sandwich!

Pesto
  • 1 big bunch of basil leaves (about 1-2 cups)
  • handful of parsely
  • 1/3 cup of parmesan cheese (Or pecorino)
  • 2-3 tablespoons of pine nuts
  • 1-2 cloves of garlic
  • 1/2 of a lemon, juiced
  • pinch of crushed red pepper flakes
  • salt to taste
  • 1/2 cup of extra virgin olive oil
Throw everything into a food processor or blender except the oil.  Get everything chopped then slowly add the oil to make a pesto as thin or thick as you like. Freezes wonderfully- but mine never makes it to the freezer ;)


Bruschetta Recipe

  • 4 large tomatoes, diced (I have also used canned diced tomatoes before- just drain them well)
  • 1 small red onion, diced
  • 1 large garlic clove, grated
  • 1 bunch of basil, torn or chiffonade
  • Extra virgin olive oil- about 1/3 cup
  • salt to taste
Combine everything and let sit to marry the flavors.


Romaine and Fennel Salad
I wanted something light and crunchy to go along with my focaccia and bruschetta
  • 2 heads of romaine, sliced
  • 1/2 bulb of fennel (aka anise), sliced paper thin- save a couple fronds for garnish (the green leafy stuff on the top of the bulb)
  • orange zest (optional)
  • 1 lemon, juiced and zested
  • 1/3 cup extra virgin olive oil
  • pinch of salt and pepper
To make the dressing combine the lemon juice and zest, salt and pepper, then whisk in the oil until it looks like a dressing.  Toss the romaine and fennel together and zest the orange on top for garnish as well as the fennel fronds.  I served the salad undressed, then had everyone pour the dressing on their own salad.  Just don't overdress the salad or it will make the lettuce heavy.  (I also made the salad ahead- if you do this definitely do not add the dressing).  Thinly sliced red onion would be nice in this salad too.


Raspberry Bellinis

So a Bellini is a classic Italian cocktail made with peach and prosecco.  I decided to change it up with raspberries. 

  • 2 bottles of good Prosecco (or any sparkling wine/champagne)
  • 1/2 bag of frozen raspberries
  • 1/2 cup of triple sec (this is really just to help the raspberries in the blender- you could omit or just use water or another flavored liquor)
Blend the raspberries with the extra liquid of your choice until it is a puree.  You can choose to strain out the seeds and pulp- I was in a rush and forgot but they were still good.  You can either make the drinks individually by adding a bit of puree to the bottom of each glass or (like I did) make a pitcher- one bottle at a time.


Panini

Panini is just a hot squished sandwich.  I do not have a panini press- but I do own a cast iron skillet.  If you don't own a heavy pan you can just weigh it down with whatever you have- a large can of beans or tomatoes etc.  One thing about paninis is that it is a good idea to make sure you have a piece of cheese directly on the bread on BOTH sides- so it acts like glue to stick everything together


Caprese: is the classic combo of basil, mozzarella and tomato.  Just slice the bread, slather both sides with pesto, top with cheese and tomato and put in a skillet with a bit of oil and pop the cast iron skillet on top of the sandwich to weigh it down. 


Prosciutto: I used sliced prosciutto, provolone and arugula in this sandwich on a roasted garlic bread. Same technique as before


Salami: This one was the best! And everything you can get right at the deli! Genoa Salami (which is a sweeter salami), Hot capicola is another type of salami-which is from the shoulder or neck- they even have sweet versions, Roasted red peppers , arugula and provolone.  Pile everything up, squish down and fry until the cheese is melty and delicious!


Did this the night before. Oh and check out my new magnetic knife holder I got for Christmas!
 Onto the dessert....

Ok so I basically followed Anne Burrell's Lemon Semifreddo recipe but of course I forgot to buy heavy cream- so I had to improvise (and pray it worked) and then when it did work out I got to call it "healthy" hehe.  This needs to set for AT LEAST 6-8 hours- so I suggest you do this the day before.

  • 1/2 cup almonds, chopped
  • other half a bag of frozen raspberries left over from the bellinis
  • 8 eggs- yolks and whites separated
  • 1 1/2 cups of sugar
  • 3 lemons, zested and juiced
  • 2 pinches of salt
Start by prepping the pan- take a loaf pan or even a small casserole dish and line with plastic wrap (for easy removal later!) then in the bottom (which will eventually become our top) coat with crushed raspberries and nuts. 

Separate the egg yolks and whites into two separate bowls- set the whites aside.  Add the sugar, lemon zest and juice and one pinch of salt to the yolks and whisk to combine.  Now we need to set up a double boiler.  In a sauce pot, that will snugly and comfortably fit your bowl with the yolks (obviously the bowl must be glass or metal), fill the pot with just an inch of water and bring to a boil then reduce to a simmer.  Put your yolk bowl on top and continuously stir the eggs until the temperature reaches 165 degrees F on an instant read thermometer.  This takes about 10 minutes.  DO NOT STOP STIRRING or you will end up with scrambled eggs.  When it reaches the correct temperature take off the heat and set aside. 

I didn't use a snug fitting bowl and it took SOOOOOO long- don't let the steam escape!


Back to egg whites: Add the other pinch of salt and beat until tripled in size and have stiff peaks.  You beat the eggs until it becomes like a whipped cream almost.  Stiff peaks refers to the fact when you dip your whisk in the egg whites, pull it out, hold vertical over the bowl for a second, then turn horizontal, and what is on the end of your whisk should look like small little mountain peaks of egg white foam.


Staight Old School- with Grandmas Hand Crank Egg Beater

Combine the egg whites with the egg yolks in three installments.  The first installment try to cut the whites into the yolks with a spatula.  Next two installments gently fold in the whites as to not let all the air out of them.

Fill your loaf pan- I had a bit left over- don’t worry I'll show you a dessert you can make right away with the extra for the cook ;) After you fill your loaf pan wiggle it around so there are no air bubbles and everything will freeze evenly.  Pop in the freezer over night until solid but still soft (like a sherbet!)


To serve- use the plastic wrap to help you pull it out of the pan and then slice and serve! Super delicious, refreshing and pallet cleansing!

Try one or try them all! Buon appetito!


Oh so back to the extra left over from dessert- now this is not brain surgery- but you are going to have to eye ball it- depending on how much egg mixture you have left- sprinkle some flour into the batter- mix as gently and as little as possible to incorporate the flour (sifting would really help here).  Mix until the batter looks like it has a thicker texture.

Now in another loaf pan or I used these cute ramekins- grease the pan, pour mixture in and top with raspberries.

Pop then into a preheated 375 degree F oven until golden on the edges.  Depending on how much flour you put in you might not be able to rely on the "toothpick method" but hey whatever comes out is at least going to taste good for a quick dessert.  It came out almost like a really moist sponge cake.  I think I baked it for about 20-30 minutes.

Before she went in the oven
Obviously we all had a great day!


Monday, October 3, 2011

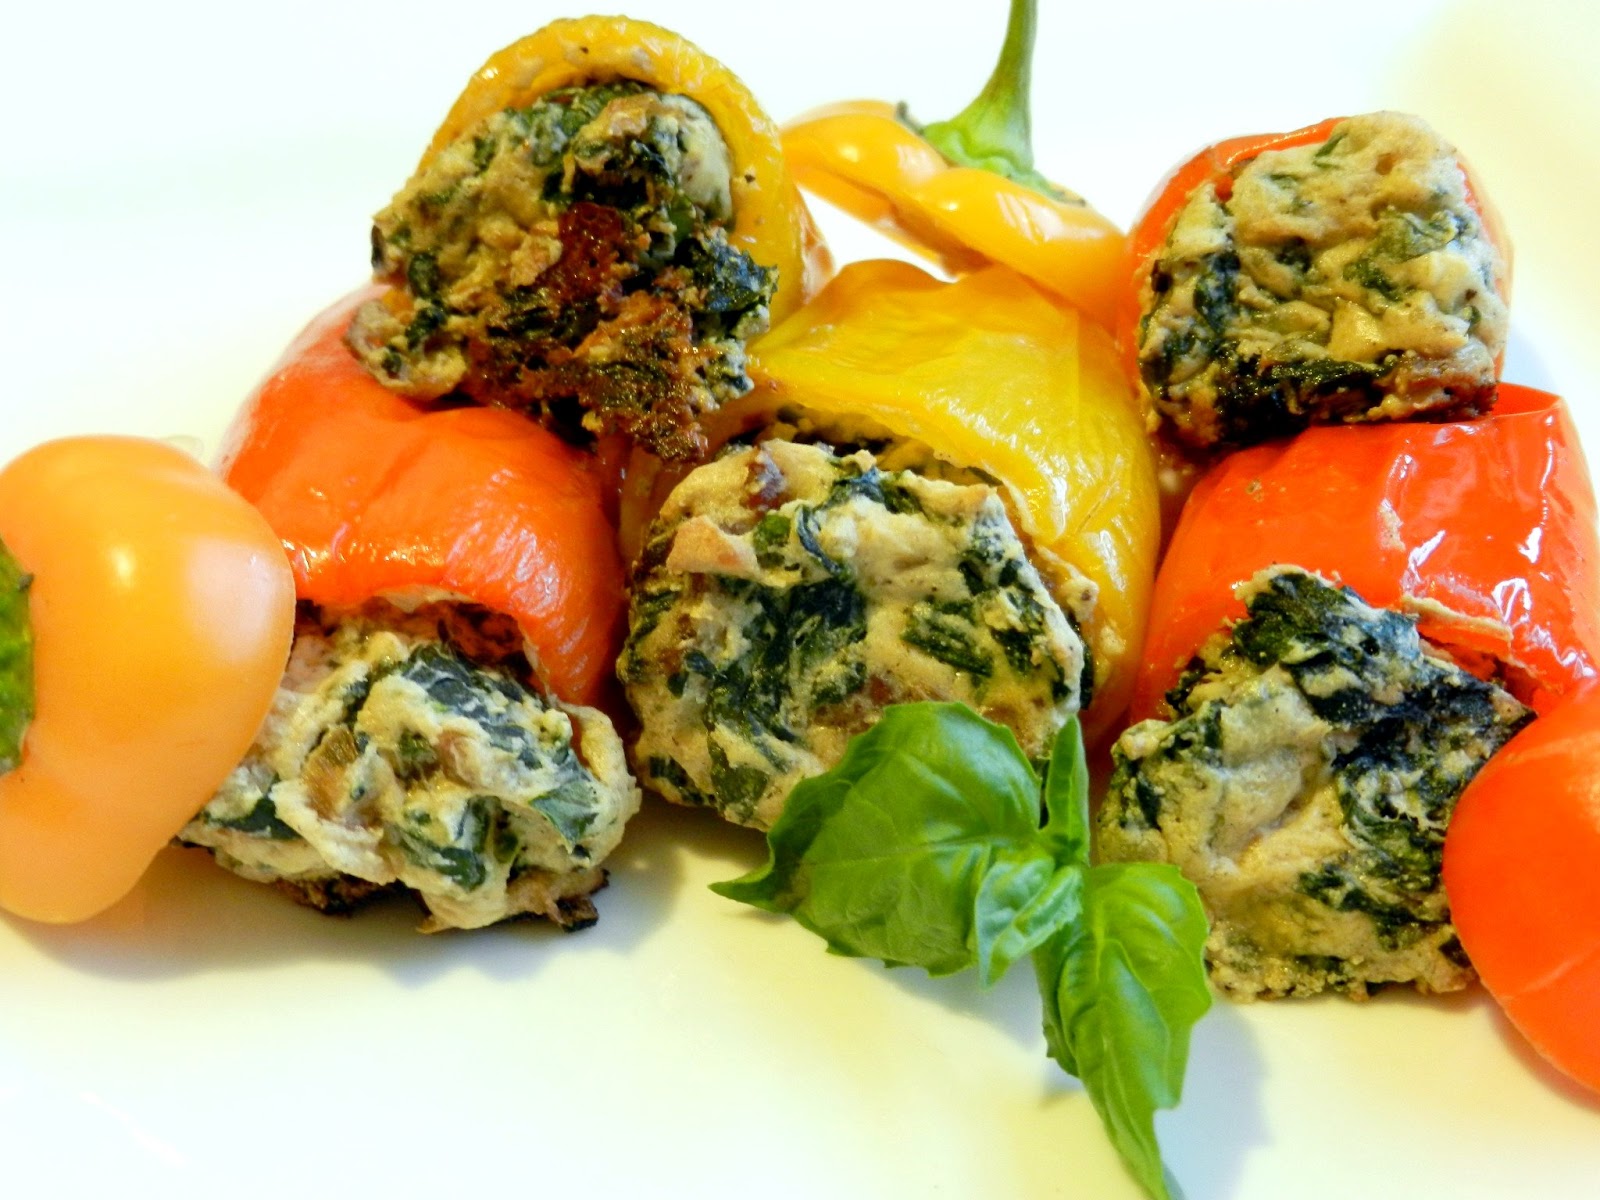
Mini Stuffed Peppers


This is one of my most viewed posts- even with the original no so perfect pictures! I think I took the first photos with my cell phone! I originally posted this in Oct 2011, and I felt it needed a photo update* (along with most of my earlier posts-see the end for originals).  Recipe is still the same and still delicious. Perfect for an easy make-a-head appetizer! 

{Since my Greek style Stuffed Peppers- w/ Beef, Orzo and Feta Cheese were such a huge hit, I decided to follow that up with an Italian style smaller/appetizer size stuffed pepper recipe.  These are so cute and colorful they are hard to resist.  Yes it is more of a summer time recipe, but I just found the recipe scribbled down and felt compelled to share.  If you can't find the mini peppers just try and go with the smallest peppers you can find, and you will probably need to cook them a bit longer.  This filling recipe will make about 20-30 mini peppers.  The peppers I usually buy come in a bag already pre-packaged.  Oh, and do I really need to mention they are super easy to make?}

Ingredients


  • 20 mini sweet peppers (I buy them in a bag of about 30-40 peppers)
  • 2 hot (or sweet) sausages, removed from the casing
  • 1 small onion or shallot, chopped
  • 3 garlic cloves, minced
  • 10 oz box of spinach, thawed and excess liquid squeezed out (or fresh spinach cooked down to about the same amount- about 2 bunches or so)
  • 3/4 cup of ricotta cheese
  • 1/2 cup of mozzarella cheese
  • 1/2 c pecorino (or parmesan) cheese
  • Salt and pepper
  • 2 tbsp fresh basil


Directions
  1. Preheat the oven to 350 degrees F.
  2. Prep peppers by cutting off the top and carefully removing/scooping out seeds and ribs from the inside.  Set aside and reserve.
  3. Meanwhile, remove the sausage from the casing and brown in a skillet with about a tsp of oil just to get it going.  After sausage is fully cooked through, drain excess oil but leave about a tbs in the skillet.
  4. Add onion and garlic- cook until soft about 5 minutes.
  5. Add the spinach and heat through
  6. In a bowl combine the cooked sausage mixture and the rest of the ingredients.
  7. Season to taste with salt and pepper.
  8. Wait until the stuffing is cool enough to handle and stuff peppers.
  9. Spray a baking sheet with some cooking spray, lay out all your peppers, drizzle with a little oil and put in the oven about 20 minutes.
You might end up with a bit of extra filling, depending on the size of your peppers. You can just put the remaining filling in a ziplock bag and then freeze for later use.


*Oh yea, and here are those original photos:


Monday, August 22, 2011

Chicken and Tomato Pizza

This is my favorite pizza.  I mean, I am a lover of all pizza, but this one is always my go-to.  I could literally eat a large pie on my own, yes I know disgusting, but that is seriously how much I love it.  I've made pizza at home countless times and sometimes it comes out simply amazing (like this one), and other times it is just ok.  I guess I haven't mastered the art form (yet), and of course it is difficult when you don't have a pizza oven that can reach temperatures over 700 degress.  I still need to invest in a pizza stone one of these days, but for now my pizza pan will do. 

I have always used the same recipe for pizza dough, which you can check out in my Margherita Pizza Blog Post but this time I tried all bread flour (honestly because I ran out of regular flour) and like 1/2 tsp of baking powder.  I don't think the baking powder actually did anything, but I figured why not try it. (I'm sure everyone that knows how to bake is mocking me right about now)

Pizza Dough Recipe
(This makes about 2 pizzas.  I usually make one big pizza and use the rest for garlic knots- we'll save that for another blog because I'm still trying to perfect that recipe)

  • 3 cups of bread flour
  • 1 tablespoon of sugar
  • 1 tsp of salt
  • ½ tsp of baking powder (optional)
  • 1 packet of dry active yeast
  • 1 cup of warm water (about 100-110 degrees if you want to get technical)
  • 1 tablespoon of extra virgin olive oil
  1. Pour the yeast into the warm water and stir to combine.  Let this sit for about 2-5 minutes to reactivate the yeast.  When the yeast gets all foamy on the top it is ready.
  2. In a big bowl combine the flour, salt and sugar (and optional baking powder) with a whisk and make a small well in the middle of the bowl. 
  3. Then add the oil and yeast water to the well and combine with your hands until a sticky ball of dough is formed.
  4. If you need to add a little more flour, just add a little at a time.
  5. Take out of the bowl and knead the bread for about 5 mins. (Anytime you knead dough you want to sprinkle the counter or work area with flour so the dough doesn't stick) Shape it into a tight ball. Then put back into the bowl and cover entire ball with some oil (I usually just spray it with cooking spray) and cover with plastic wrap where the plastic wrap is touching the dough- not tightly covering the bowl on top, we are just covering the dough from the air so it doesn't form a tough "skin".  You could even drape a kitchen towel over the top of the bowl instead.
  6. Let sit for at least 45 mins in a warm place until it has doubled in size.  If you don't have a warm place, turn the oven on to 200 degrees for a couple mins then place the bowl with the dough in there (but obviously shut the oven off- we aren't cooking the dough yet)
  7. When it has doubled in size, knead it again for about 5 mins and then divide the dough into two even pieces.  Roll out the dough into the shape of your pan (pizza pans are cheap- I have two: one from Waldbaums, and one from Wal-Mart, but before I had the round pans I just made my pizzas "Sicilian" or rectangle and put on a baking sheet.) Transfer to your pan and top with toppings.
  8. Cook for at least 10 mins at 450-500 degrees.  Pizza cook time will vary on crust size and what you topped the pizza with.
Now onto the toppings...

  • 1 boneless skinless chicken breast, diced into small pieces
  • 2 tomatoes, diced (or one (14oz) can of diced tomatoes drained)
  • about 10 basil leaves, chiffonade (Which means cut into thin long strips.  All you do is pile up the basil leaves, roll them into a little log and cut across, the result will be nice ribbons of basil) but you can also just rip or chop.
  • about 8oz of mozzarella cheese (but I probably wind up using more)
  • 1/4 cup of you favorite sauce
  • oil, salt, pepper, red pepper flakes
  1. Dice the chicken.  In a small frying pan add about a tsp of oil to the pan and heat over medium heat.  When hot add the chicken and a pinch of salt, pepper and red pepper flakes.
  2. Cook only about 5 minutes until the chicken is no longer pink.  Turn off the heat and set aside to cool.
  3. Dice the tomatoes and seed/squeeze them out a little.  You don't want your pizza to be watery.
  4. When you have your dough ready and on the pan, coat the dough with sauce.  Use very very little sauce.  Too much sauce is a common mistake and will result in a wet, uncooked bottom of the pizza. Gross. 
  5. Top will cheese, cooked chicken, tomatoes, and basil
  6. Cook until done.

Wednesday, August 10, 2011

Pan Fried Chicken w/ Arugula Pesto Pasta

Pesto is such an awesome basic recipe to know.  There are so many ways you can switch it up! It is great for fresh herbs that are about to go bad.  I had about 2 cups of arugula that was on its way out and some parsley as well, so I decided on pesto.  Classic pesto is a mixture using basil, garlic, pine nuts, Parmesan cheese blended with olive oil.  Essentially pesto means to crush or pound which is how it is traditionally made with a mortar and pestle.  Now-a-days food processors make easy work of it.  So here are the basic essentials when making a pesto of any kind:

-fresh herbs
-garlic
-a nut
-Parmesan or Pecorino cheese
-oil

Sometimes I leave out the nuts because I don't have any, not the end of the world.  I also love to add lemon juice and zest into my pestos too.  I like pestos because they are not rocket science, as you will see from the recipe I don't have exact measurements on a lot of things because I just throw everything in a food processor, taste at the end and if it needs more of one thing I just add it and blend up again, taste and repeat if necessary.  Also, pan frying chicken with a quick and easy pan sauce is impressive and tasty.

Arugula Pesto
  • 2 cups of arugula
  • handful of fresh parsley
  • 1-2 garlic cloves, minced or grated
  • 1/2 lemon, juiced and zested
  • handful of almonds
  • 1/2 cup of Parmesan cheese
  • freshly grated pepper
  • pinch of salt (easy on the salt, the cheese is very salty, taste to make sure)
  • about a 1/2 to 3/4 cup of extra virgin olive oil
Combine everything in a food processor or blender and blend until a loose paste.  Sometimes I add just a bit of water to make it more loose (instead of using more oil)

Boil up your favorite pasta and top/toss with the pesto!

Pan Fried Chicken


  • 3 boneless skinless chicken breasts (butterflied in half to make them thin cutlets for quick cooking)
  • 1 tbsp salt
  • fresh cracked pepper
  • about 1 cup of flour
  • 2 garlic cloves smashed
  • tsp red pepper flakes
  • 1 onion, diced
  • 1 cup of dry white wine
  • 1 cup of chicken stock
  • oil
  1. In a skillet heat some oil on medium low with the smashed garlic cloves and red pepper flakes.  Try and keep the garlic in large pieces so we can remove it easily later.
  2. Don't let the garlic burn, keep heat on a low setting until we are ready with the chicken. 
  3. While the oil is infusing with the garlic and chili flake, combine the flour, salt and pepper on a plate or shallow bowl (I use the leftover Chinese take out containers, they work perfect). 
  4. When you are ready to cook the chicken, remove the garlic from the pan and discard.  Turn the heat up to high/med-high.  Dredge the chicken in the flour mixture and shake off any excessive.  Put chicken in the pan.  We are cooking it only a couple minutes on each side, just until they are brown and golden.
  5. When all the chicken is browned on both sides (don't worry it doesn't necessarily have to be cooked through) take out of the pan and reserve. 
  6. Add about 2 more tbsp of oil to the pan and then add the onion.  Cook the onion a couple minutes until soft and translucent.  Then sprinkle about 2 tablespoons of the flour left over from dredging the chicken on the onions (if you don't feel comfortable doing this, use fresh flour).  Cook out the flour for about a minute. 
  7. Add the wine and stock to the pan and whisk until all combined.  Add the chicken back into the pan and bring to a boil, then reduce to a simmer.  Coat the chicken in the sauce and now you just have to keep warm until ready to serve.
  8. Plate the chicken and top with some extra sauce.
I served this all alongside my Lemon Garlic Broccoli Sidedish Yum!


Related Posts Plugin for WordPress, Blogger...