Showing posts with label baked. Show all posts

Thursday, August 2, 2012

{No Skillet} Baked Ziti & Catering 101

So last Saturday I helped my Aunt with my cousin's graduation party.  I made 1 full tray of eggplant rollatini, pulled pork, assorted roasted veggies, tex mex rice, and 5 full trays of baked ziti.  She cooked dishes like chicken, bacon mac and cheese, penne ala vodka etc.  So we definitely had a nice spread. 

I love cooking and my family -so what better way to tie it all in as to help cater a party.  Unfortunately because of the rain the turn out wasn't as many as expected, but we still had a lot of people come- maybe 100 including kids.  I really hope to take this catering business further because I had a lot of fun with it. 

It is definitely some sort of art to prepare what I did in a kitchen so small with one oven.  Oh, and did I mention I have never made eggplant rollatini before.  It came out really good!{Thank God!}  I took this challenge on full force and bought wayyyy too much food (thank god for returns) and spilled some food in my trunk- gross (thank god for carpet cleaner). But overall it went great.

I also misread my Aunt's message and made WAY too much ziti- so here's a quick and easy recipe for baked ziti- because if I can make 5 full trays in one night, you can make some for your family for dinner :)

Oh, also baked ziti is supposedly traditionally made without ricotta cheese- but who wouldn't want ricotta cheese!? This is also a non-meat version- if you wanted to add meat- you would have to use a skillet ;)  And of course this isn't one of my healthier meals- but you can use part skim ricotta and mozzarella, plus whole wheat pasta for a "lighter" version- maybe swap some pasta for some veggies.

Ingredients
(I usually use a 9x13 casserole dish with this recipe)
  • Olive oil
  • 28 oz can of crushed tomatoes
  • 1 onion, chopped
  • 3 garlic cloves minced
  • 1 tablespoon of dried basil
  • 1 tablespoon of dried oregano
  • 1 tsp of red pepper flakes (or more if you like it spicy)
  • 1 cup of ricotta cheese (I usually use part skim)
  • 1 lb of ziti (or you could use rigatoni or penne or any tubular pasta you have on hand)
  • 1/2 cup or so of mozzarella cheese for the topping
Directions

  1. Preheat your oven to 400 degrees F
  2. Get your pasta water on to boil.
  3. In a small sauce pan- saute your onion in about 2 tbs of olive oil on medium.  After they get soft about 5 to 7 minutes add your garlic and saute about 2 minutes. 
  4. Then add your tomatoes to onion and garlic.  Add your spices and stir to combine.  (I like to add a bit of water to the sauce to make it a bit thinner- but this a personal preference)
  5. Bring the sauce to a boil, then reduce to a simmer- let simmer until your ready to assemble.
  6. When the pasta water is boiling, add your pasta and cook to al dente (because it will continue to cook in the oven)
  7. Get your casserole dish and add the sauce and ricotta cheese to it and mix to combine (I don't get crazy with mixing- it will all combine well when baking)
  8. When pasta is done add your pasta to the casserole dish and carefully toss the pasta (so no overflow) with the sauce and cheese.
  9. When that is done top the pasta with mozzarella cheese (If I have sometimes I like to use parmesean and mozzarella).  Cover with tinfoil and bake for 30 minutes.
  10. Serve and enjoy! Suggestion: serve with salad. 

I also apologize for no picture :( As you can see after I made all this food, I was just happy I was able to finish it all in time. Yea, 18 of those bad boys.

If anyone in the Long Island, NYC area is interested contact me at bstarcatering@gmail.com

Thursday, May 10, 2012

Mayo Crusted Chicken

This is a super flavorful and super easy way to prepare chicken.  I have seen this done a lot with fish, but we are not so big with fish in my house- so chicken it is.  Serve along side my Pasta with Creamy Broccoli Sauce.


For this you need to use low fat mayo or a soy based mayo.  The low fat (green cap) Hellman's mayo only has 15 calories and 1 gram of fat per tablespoon. You just can't beat it. I never buy any other mayo and it has basically the same texture and just a lighter, less heavy flavor than regular mayo. Love it.

This recipe is easy to manipulate to other serving sizes- just remember 1 tbsp of mayo per breast.

Ingredients

  • 3 chicken breasts
  • 3 tbsp of mayo
  • 1 tbsp of fresh thyme
  • salt and pepper
  • red pepper flakes
  • 1/2 cup of panko bread crumbs

Directions

  1. Preheat your oven to 450 degrees F
  2. Lay out your chicken on a cooking sheet sprayed with cooking spray.
  3. In a small bowl combine the mayo and spices.
  4. Each chicken breast gets one tbsp of mayo- spread out over the top of each chicken breast.
  5. Sprinkle and coat the mayo with bread crumbs.
  6. Bake until golden on top and cooked through -about 25-35 minutes.


Before the oven


Tuesday, April 3, 2012

Almond Crusted Chicken


So this isn't an original idea, but the first time I tried it and *omg* it was delish.  Even my fiance gave it two thumbs way up.  It was nutty and juicy.  I served it with my healthy Sweet Tater Tots and Kale Chips

Oh and first time pics with my new plates!!!!!!!!! ah super awesomenessssss!

Ingredients

  • about 3 chicken breasts, boneless and skinless
  • 1/2 tsp of garlic powder
  • 1/2 tsp of paprika
  • 1/2 tsp of cayenne
  • 1/2 tsp salt
  • 1/2 cup of almonds
  • 1/3 cup of whole wheat flour
  • 1 egg
  • cooking spray
Directions

  1. Preheat the oven to 475 degrees F.
  2. Line a baking sheet with foil and pop a wire cooling rack on it and spray with cooking spray.
  3. Put the nuts, spices, and flour in a food processor and pulse until all chopped up and mixed
  4. In one dish combine the egg and a splash of water.  In another pour the nut/flour mixture.
  5. Dip the chicken in the egg and then the nut/flour mixture.  I did this twice- dipped twice, but that is a personal preference. 
  6. Then lay on the rack or baking sheet and spray with cooking spray.

  7. Cook for about 20-25 minutes until the chicken is cooked through and the outside is nice and golden and crusty.

Monday, September 12, 2011

Chicken Nuggets and French Fries


(Right off the bat I must apologize for the pictures, it was late and we were hungry, and I burnt the french fries, so obviously I didn't take any pictures of those.  But the nuggets tasted awesome and were super easy to make too)

So we never eat fast food. Well not never, but rarely.  Just because we don't eat it, doesn't mean that I wouldn't want to eat it.  Who doesn't love those delicious hot crunchy greasy salty french fries? ::drool::  Anyway, having it once in a while is ok, but not all the time.  So that's why you can do it at home and know EXACTLY what parts of the chicken are becoming a "nugget" and save yourself from about a days worth of fat and calories.

I've heard so many moms say "Oh, my kids will only eat chicken nuggets".  First of all, I am not a mother, so I can imagine that nothing with kids is as easy as it seems, but I would like to think that if your child(ren) got involved in the cooking process then maybe they would be interested in eating other things and broadening their pallet horizons.  Believe me, my mom had to do the "yea, it's chicken" thing for everything that wasn't chicken for us, but that's because the pork chops were like chewing on a leather shoe, and veggies were boring (and gross).  So you have to make food interesting and fun for kids- why do you think they love nuggets and food on sticks?

Anyway, regardless of your child's eating habits, I think everyone loves chicken nuggets and french fries! This recipe will make it easier for you to let them to have seconds and the sauces to go with them are endless.  Anything on your fridge door- ketchup, honey mustard (honey + Dijon mustard), BBQ sauce, hot sauce, ranch dressing etc.  You can also add veggies into the chicken nugget mix- just make sure they are neutral color so the inside still looks white like chicken.

Also, these are perfect for freezing too.  Make 2 batches and eat one tonight for dinner and freeze the other for the next time- just gotta pop in the oven!

Ingredients 
(This will make around 21 nuggets)

  • 2 boneless skinless chicken breasts
  • 1 tsp onion powder
  • 1 tsp salt
  • couple grinds of fresh black pepper
  • 1 egg
  • panko bread crumbs (1-3 cups)
  • non stick spray

Directions

  1. Preheat the oven to 450 degrees F.
  2. Combine first five ingredients in a food processor along with a handful of breadcrumbs. Cut chicken into chunks to make it easier to grind.
  3. Blend until it is all ground up and incorporated.
  4. Remove from food processor and put in a bowl.  If the mixture is too wet just add more breadcrumbs and mix together in the bowl. (This is why I can't tell you exactly how much breadcrumbs your going to need- it varies)
  5. Take the remaining bread crumbs and pour into a separate bowl.
  6. Time to form nuggets.  I'm pretty sure we all know what a nugget looks like so shape into little disks and coat with bread crumbs and lay on a sheet tray or baking rack.
  7. When all are done, spray with non-stick spray and cook in the oven until golden brown and crispy. 
  8. Cooking time will vary, but I think I cooked mine for about 20-30 mins.
  9. To freeze left overs, just put into a ziplock and pop in the freezer.  Just be gently, you don't want all the breadcrumbs to fall off.
 
FRENCH FRIES
Which should more appropriately be named oven fries, but just be careful not to burn them like I did.  Making your own fries is awesome too, because you can flavor them anyway you want.  Any spice that you like- garlic, onion, cayenne, chili, rosemary, etc - can be added to this recipe.

Ingredients

  • About 2-3 large Russet baking potatoes
  • Oil, salt and pepper

Directions

  1. First clean your potatoes.  I like to leave the skins on, but you can most certainly peel yours.
  2. I used a mandoline with the french fry cutting blade, but if you don't have one you can always just cut them into french fries with a knife. 
  3. Spray the baking sheet with non stick spray and lay all your fries down in a single layer.
  4. Coat in oil, salt and pepper (and any other spice you like). Toss to coat everything.
  5. Put in the oven along with your nuggets.  Check on them, because honestly every time I cook them it's different.  30 minutes is the about time they will cook.  (So figure the nuggets and fries will be done around the same time) I've also tried flipping them half way, if they come off the sheet pan easy- flip them, if not let them cook a bit longer then try again.  Otherwise they will break and smear and be a big mess and burn on the pan.  But there has been times when I didn't flip them and they came out fine too.

Friday, May 20, 2011

(Tofu) Wonton Raviolis

I know, I know, tofu OMG! Honestly the only difference this had from using ricotta cheese- was the texture, not the taste.  Of course you can just substitute the tofu for ricotta cheese and it will just be a bit creamier.  Make this for your family but don't let anyone know it's tofu- I bet they won't even notice.

Tofu facts:
  • Tofu is made of soybeans.
  • One half-cup serving of raw firm tofu contains 10 grams of protein, only 94 calories and 5 grams of fat
  • Tofu is also cholesterol-free as well as a great source of calcium and iron
  • Tofu is great at absorbing flavors and spices (kinda like chicken) because it works like a sponge and really doesn't have its own flavor.
  • There are two different kinds of tofu: silken and firm. Silken is like cream cheese (I have never used this one) and firm.  The firm type, when crumbled, looks like scrambled eggs or ricotta cheese.
Preparing Tofu
  • Tofu is packed in water. Think of it as a big sponge. Most recipes call for "draining" the tofu.  Basically drain the water and then wrap it in a bunch of paper towels and press it between two plates. Plate-tofu wrapped in paper towels-plate-something heavy on top to apply pressure to squeeze all liquid out.  Doesn't take long- about 15mins or so. 
Wontons!
  • Let me just begin by saying wonton wrappers are freaking awesome.  15 calories each and you can stuff them with anything- even dessert stuff!  They can be steamed, baked, fried, sauteed, boiled, frozen.  Look in your produce or frozen dept. If you have an Asian supermarket you can always find them there.  They are extremely cheap (for me its like $1.50 for 50 wrappers).  This recipe will make about 40 wontons. I keep them in my freezer and they thaw out super quick.

Ingredients
  • 1 (I think its like 16oz) package of firm or extra firm tofu
  • 1 cup of spinach (I used fresh baby spinach but you can always use frozen-thawed and squeezed though)
  • 2 cloves of garlic minced or grated (if you're not such a garlic fan use only one clove)
  • About 7 basil leaves, torn or chopped (if you don't have fresh used a tsp of dried)
  • 1 tsp each of: onion powder, oregano, crushed red pepper flakes, and salt
  • Few grinds of fresh black pepper
  • 1/2-3/4 cup of cheese- I used fresh Pecorino Romano, but you can use Parmesan or mozzarella
  • 1 egg
  • Package of wonton skins/wrappers (about 50 wrappers)
  • Cooking spray
  • Small bowl of water
Preparation:
  1. Preheat the oven to 350°F.
  2. In a bowl break up the drained tofu until it looks like ricotta cheese-ish.  Add the spinach, garlic, basil, dried spices, cheese and the egg.  Mix that all together.
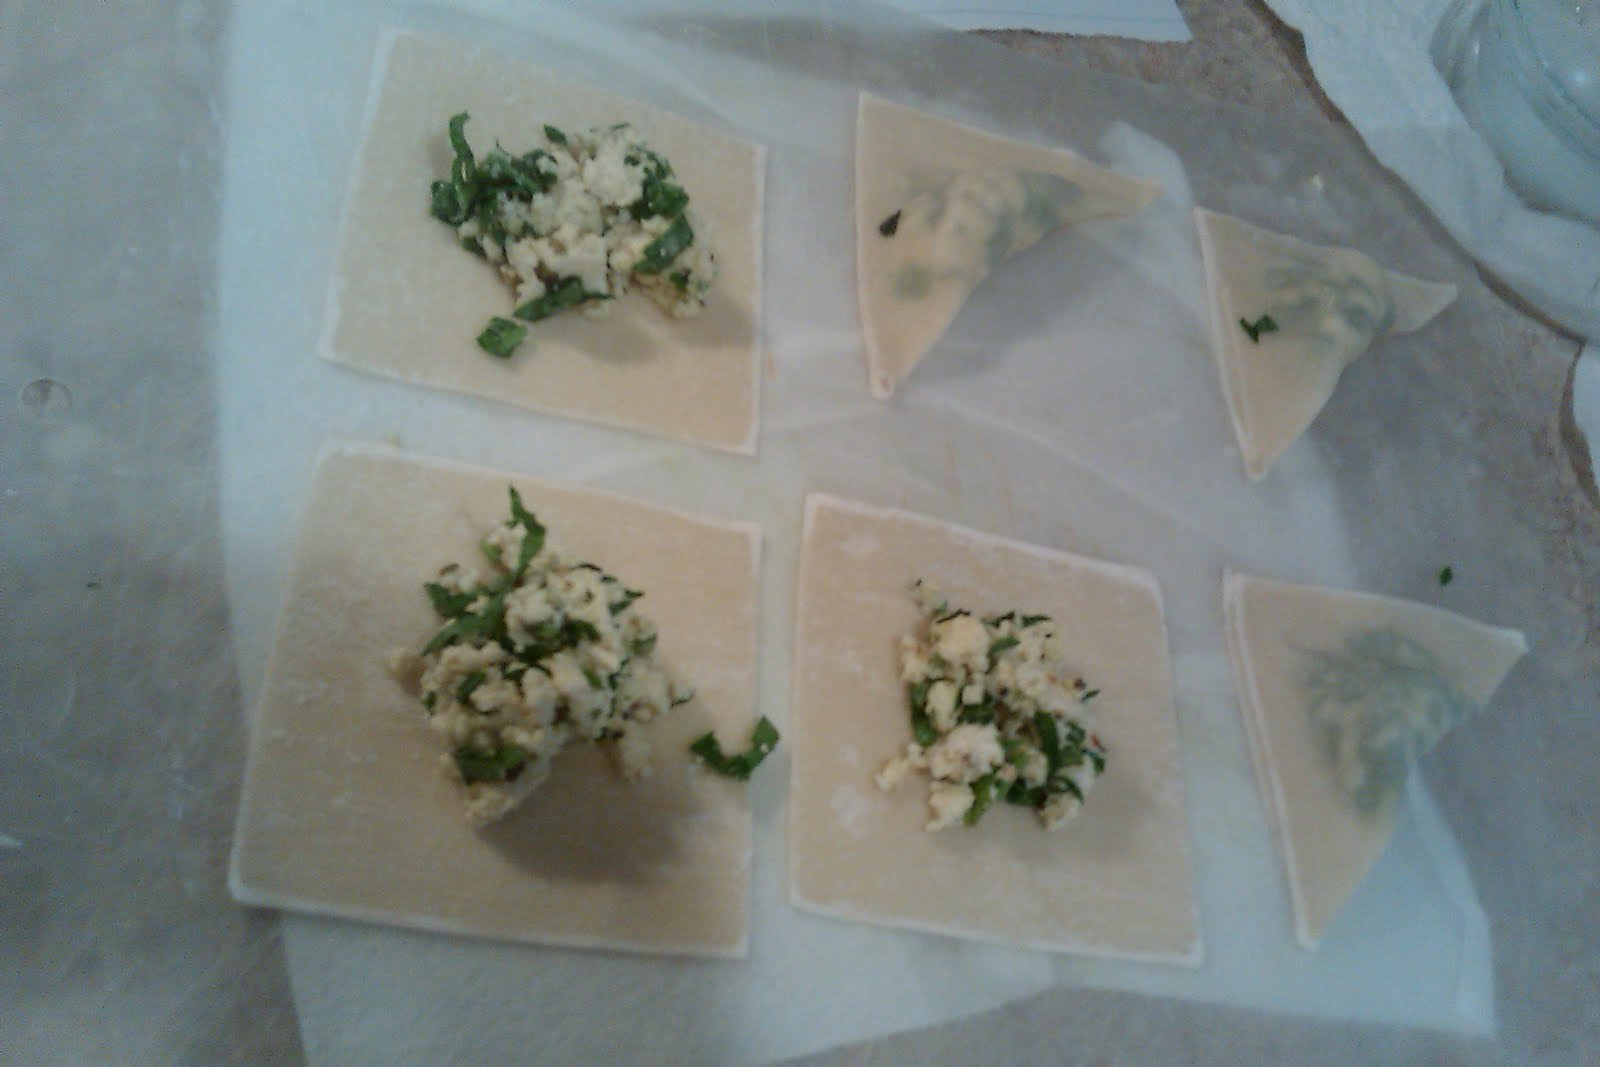
  3. Using a tablespoon (don't overload the wonton! it will break apart and become a mess), scoop one tablespoon of the mixture and put in the middle of the wonton.  Using the water dip your fingers and put the water on the edges of the wonton, then fold over into a triangle and seal-try to get most of the air out-place on baking sheets sprayed with cooking spray.
  4. After they are all done, spray the tops with cooking spray and pop in the oven for about 15-20 mins.
  5. Serve with your favorite marinara/tomato sauce!


PS: these are awesome for parties and appetizers.  I know they are a pain in the ass to make-it takes a little while- but worth it in the end. If you dont have a lot of time that day you can prepare them and then just freeze them! (freeze them flat on the trays if you can, then put into ziplocks) (If you ever had frozen pierogies its sort of like that) Then just pop in the oven (might have to bake a little longer-or you can just defrost them on the counter first).  This idea is great for like wonton soup or you can even make pierogies just stuff with mashed potatoes, garlic and cheese!
Related Posts Plugin for WordPress, Blogger...