Showing posts with label spaghetti. Show all posts

Wednesday, August 8, 2012

Zucchini Spaghetti w/ a Quick & Fresh Tomato Sauce


Super easy weeknight dinner that even the kids are going to have fun eating!  And no one will even know its healthy! ::haha:: Serve with my Homemade Sausage.

Cut down on carbs with this dish while getting your dose of veggies.  {I used whole wheat pasta for even bigger protein boost}  If you can find this in your grocery store pick it up! I found this in my pre-packaged produce section.  How cute is this package of zucchini!?


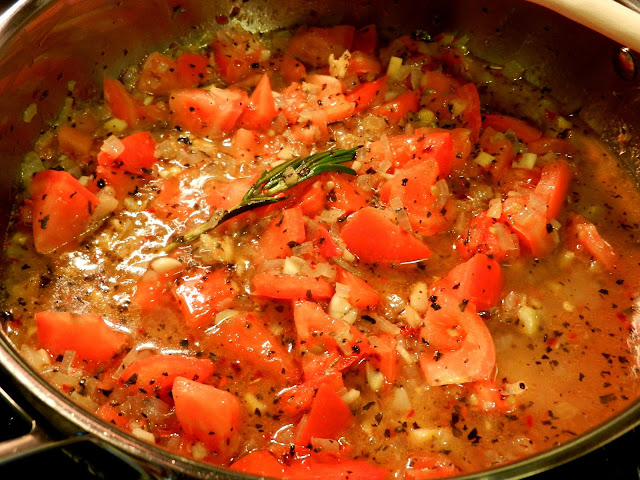
Sauce is super simple and takes minutes to come together- all you're waiting for is the pasta water to boil!


Ingredients

  • 1/2 lb of whole wheat spaghetti (yes! only 1/2 the box in necessary!)
  • about 1 lb of shredded-into-strings zucchini
  • 1 small onion, diced small
  • 2-3 cloves of garlic, minced
  • 2-3 plum tomatoes, diced
  • 1/2 cup of water
  • 2 tbsp of olive oil
  • 1 tsp of salt (or more to taste)
  • 1 tbsp of dried basil
  • pinch of red pepper flakes

Directions

  1. Get the water on to boil for the pasta.
  2. In a large sauce pot or skillet (bc when the pasta is done we will toss in with the sauce- need some room to toss)  over medium heat add the oil.
  3. When the oil is hot add the onion and saute until soft (about 5-7 minutes).  Then add the garlic, saute for a minute or so.
  4. Then add your tomatoes- cook for a minute or so- I like to squish them a bit in the pan so they release some juices. 
  5. Then add your spices.  Cook for a minute.
  6. Then add the water.  Bring to a simmer and keep on a low simmer until ready to serve.
  7. (In the picture I used a small branch of rosemary too, bc I had rosemary in the sausage- but this is totally optional)
  8. When the pasta is al dente add it to the sauce pot along with your zucchini and toss until warmed through and zucchini is soft (zucchini is cut so thin it cooked in a minute or so)
  9. Serve topped with some parsley and grated romano!

Monday, October 10, 2011

Winter Squash- Spaghetti Squash

Winter squash are awesome.  They are healthy, cheap, can feed an army and are easy to prepare.  There are definitely a couple varieties but this particular installment will focus on Spaghetti Squash.

I simply made this as a side dish but the best part about this squash is that if you are watching your carb intake- just scoop out the flesh and top with your favorite tomato sauce.  Yea, it's that easy- it has a subtle nutty flavor and is way healthier for you then pasta.

  • All you will need is a spaghetti squash- I think mine was about 5 lbs (bought it at 79cents a pound), salt, pepper and some oil.
  1. Preheat your oven to 400 degrees F.
  2. Cut the squash open longways and scoop out the seeds. Save the seeds! (Ill show you what to do with them later)
  3. Sprinkle the inside flesh with salt, pepper, and oil- rub all over the inside so it is all coated.
  4. Flip the squash so it is cut side down on a baking sheet.
  5. Roast in the oven about 20-30 minutes, size will effect cooking time.  You know it is done when you poke it and it is soft to the touch.
  6. Don't worry if it get a little brown.
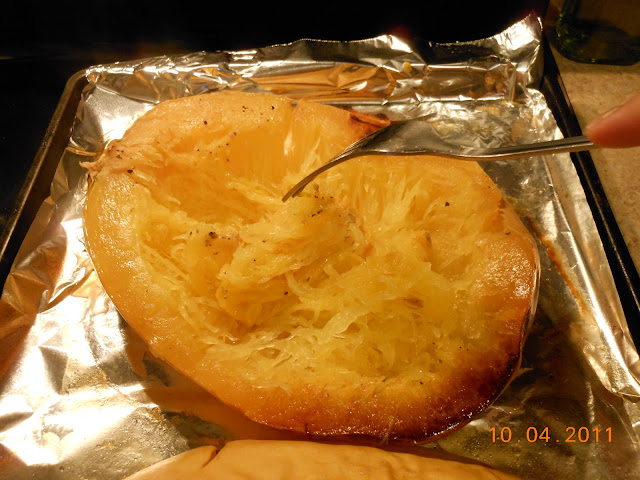
  7. When done, flip over carefully, it will be very hot and steam will escape from the underside.  If you cooked it enough the flesh should peel right away from the skin.

No mystery why they call it spaghetti squash!


And that's it! Top with salt and pepper or your favorite sauce. 

Now, what about those seeds- I think the seeds are my favorite part! If you have ever roasted pumpkin seeds- this is exactly the same thing.  Seeds are a little smaller, but taste exactly the same.

So after you scoop the seeds out, clean them up a bit and try to separate the seeds from the stringy flesh stuff.  You can rinse them off if you like. 

When cleaned, lay out evenly on a baking sheet and sprinkle with salt.  Pop in the oven alongside your squash (at 400 degrees) and roast for a couple minutes until brown.  It will take about 10 minutes.  Then just eat!  You can do this with any type of squash.

Tuesday, July 19, 2011

Sausage Meatballs, Spaghetti & Focaccia

All week Brendan has been telling me he wants "sausage pasta".  This is usually just pasta tossed with hot Italian sausage and maybe a veggie.  I didn't feel like making it honestly because I had time to make something a bit more fancy- but I wound up making something just as easy.  Instead of cooking the sausage and then slicing them, I took the meat out of the casing and formed meatballs- just like any other ground meat.  It is surprising when you bite into the meatball- you aren't expecting it to taste like sausage.  I paired it with spaghetti and my jarred sauce.  I also tried out Anne Burrell's Focaccia Recipe, it came out great, but the way I did it varied from the original recipe (especially since I don't have a mixer with a bread hook). It takes a while to prep the dough for the bread; you'll need about 2 hours before you actually put it in the oven for 30 mins or so.  If you want to do the bread too- skip down to that part first...


Sausage Meatballs
  • 1 ½ lb of Italian sausage (hot or sweet) removed from the casing
  • 1- 1½ cup of frozen spinach (thawed and excess water squeezed out)
  • 2 garlic cloves, minced
  • about 2 handfuls of bread crumbs
  • 1 egg
  • 1 tsp salt, few grinds of fresh black pepper
Preheat the oven to 425 degrees.  Combine all ingredients in a bowl and then roll into meatballs.  You can make them any size, but remember to cook them through- I went for at least 160 degrees F, it took about 20-25 minutes and my meatballs were about 1½ inches in diameter.  Bigger meatballs probably will take longer.  Since the sausage is already very oily I just sprayed them with cooking spray and put them in the oven.


Sausage Meatballs


Boil some water, salt it up, and drop your pasta about 5 minutes before you serve the meatballs and top with your favorite sauce! Easy, but fun and different!

Ok, now to tackle the focaccia...

Notes on Anne Burrell's Focaccia recipe:


  • First of all this is going to make a whole bunch of bread, about 15 pieces of 4in x 4in. depending on the size of the pan you bake it in of course.  But don't worry, it doesn’t stale that quick, and I already have another recipe you can use it in lined up.
  • The recipe calls for 1 ¾ c of water. I think this is too much, start with 1 cup and see if you need to add more as you go- I wound up adding so much more flour by the time it was the correct consistency.  This also could have been the result of using two cups of bread flour with 3 cups of AP flour, instead of all 5 cups of AP flour. (I ran out of AP flour, so I had to substitute the finer bread flour)
  • No mixer or bread hook- so had to go old fashion and use my hands.  Combine all dry ingredients in a big bowl then when the yeast water is foamy on top combine all wet ingredients into the dry.  When it comes together, turn out onto a floured surface and knead for 5 minutes- yes I actually did knead for 5 minutes- it's not that bad and it makes the end result better because when you knead the dough you are forming glutens (like a web that traps all the air bubbles so when it cooks it puffs up and cooks correctly).
  • Put back into the bowl, spray with cooking spray and loosely cover with plastic wrap (just like we did with my pizza dough recipe). Let it rise and double in size for an hour.
  • After an hour, take the other ½ c of oil and spread it out on your baking sheet.  Then take the dough and knead it about a minute or two before you put on the baking sheet with oil and coat the dough- then stretch dough out to fit the pan- almost like if we were making Sicilian pizza.  As you are stretching it out make a lot of weird finger indentations and holes in the dough.  (don’t worry it's supposed to look like that)
  • Now set aside and let rise again (I know, I know) for another hour.


Before


  • When the second hour is up, make your meatballs; preheat your oven and pop meatballs and bread in the oven together... They take about the same cooking time so it works out perfect.  The bread actually took a bit longer about 30-35 mins. Make sure you let it rest for at least  5 minutes before cutting and serving too.
  • Oh and before I put the bread in the oven, I sprinkled it with 1 tsp of salt and 1 tsp of dried oregano. As well as drizzled with more oil. You could also top it with vegetables or any other dried herbs you like, as well as meat or olives.


After

Related Posts Plugin for WordPress, Blogger...