The Search for the Perfect Balance of Food, Fitness and Real Life.
Showing posts with label easy. Show all posts
Monday, March 4, 2013
Filet Mignon w/ Horseradish Cream Sauce
This dinner is super easy. Hardest part will probably be cleaning and prepping the meat. If you don't feel all that adventurous you can buy pre-prepped filet's. But the whole beef tenderloin was on sale for $6.99/lb- that is a great deal. I was able to get 5 thick small medallion sized steaks, plus left overs that I froze and will deal with another time (fajitas maybe?).
And mashed potatoes and a roasted veggie of your choice makes this a super easy (and pretty quick cooking) meal. I would have loved asparagus, but they didn't look good at the store and I didn't want buy a sub par veggie with such a high cut of meat.
Here is a great video for how to Trim Beef Tenderloin. But obviously instead of tying and roasting, we will cut little steaks of equal size and tie to help keep their shape when cooking.
Then I put back into the fridge for a couple hours (you don't have to put in for that long, maybe just an hour or so). Then before cooking you want to pull the meat out of the fridge and let come to room temp before cooking.
When the meat is ready I heated my cast iron skillet with a little canola oil. All I seasoned the meat with was salt and pepper. I cooked these (because they are so small) about 5 minutes on each side (not even that long) for medium.
ALWAYS let the meat rest. When the meat is resting it will continue to cook because of the carry-over cooking time, so don't be afraid to pull them out of the pan early. You can always heat them up a little more in the oven if too rare for you-but once they are over cooked, they are ruined.
Let rest five minutes. Meanwhile make your sauce.
Horseradish Cream Sauce
For every 1/2 cup of fat free plain yogurt I used about 2-3 tbsp of horseradish. We like it spicy. Then just a pinch of salt and lots of fresh cracked pepper. I also added a couple scallion bits. Done!
Mashed Potatoes and Roasted Broccoli
Mashed potatoes: I used about 10-15 small russet potatoes. Peel, (I also like to cut mine into small chucks for quicker cooking time) put in a pot, and cover in cold water. I added 5 smashed garlic cloves, salt and pepper to the water. Bring to a boil and boil until the potatoes are soft and a fork goes in and out of them cleanly.
Drain, return to the pot and then you can pick out the garlic cloves if you desire. Add 2 huge tablespoons of butter and about 1-2 cups of milk, then mash away! It will depend on on how you like your potatoes. (Not exactly healthy, but it tastes good and it is a special occasion).
Taste them before you add more salt and pepper, if it needs- add more. I cover mine and let sit until everything else is ready. I topped with scallions for garnish (you could use chives too)
Broccoli: Preheat your oven to 450 degrees F. Fill a baking sheet with broccoli florets, drizzle with oil, salt and pepper. Toss broccoli and roast for about 20 mins. Just keep an eye out, when they start looking burnt on the edges- that's when you can remove from the oven. Don't worry they will taste amazing.
Then just pour some wine (we had our fav Cabernet Sauvignon) and enjoy with your hunny!
Labels:
beef,
broccoli,
easy,
filet mignon,
horseradish,
potatoes,
special
Wednesday, February 13, 2013
{CrockPot} Chicken Fajitas
I have tried sweet and sour chicken, chicken fajitas and tonight is sausage in sauce with pasta. I need to go food shopping asap, so not sure what the rest of the week will bring!
Ingredients
- about 2 pounds of boneless skinless chicken breasts (I think I had a bit less than 2 lbs)
- 2 onions, sliced
- 2 peppers, sliced
- 3 garlic cloves, minced
- 1 chipolte pepper in adobe, minced
- 1/2 cup of chicken stock
- 1 lime, zest and juice
- spices: 2 tbsp cumin, 2 tbsp chili powder, 1 tsp oregano, a pinch cayenne
Directions
- Add the onions, peppers and garlic to the bottom of the pot.
- Add the chicken and the chicken stock.
- Add the rest of the ingredients. (When you add the spices try and sprinkle evenly over the chicken)
- Set on low for 5 hours (or anywhere between 4-8 hours. I try and not over do it with boneless chicken breasts because they tend to dry out a tad).
- When done, shred the chicken and mix in the juices. Serve on a tortilla and with any toppings you prefer! (I went with avocado, jalapeno peppers, tomatoes and cilantro)
Not only is this healthy, but super simple. I just gave my little sister a crockpot for her new home- so here's another recipe for ya Cait! :)
Thursday, February 7, 2013
Sausage & Polenta (Easy & Rustic)
Very rustic Italian dinner you can whip up in 30 mins. Don't fear polenta- it's easy! But if you are worried or super strapped for time you can pick up some quick cooking polenta. Picture isn't that great, but it was really tasty- especially the sauce.
All these items you can have in your freezer and pantry. That's why it is a great recipe to have in your back pocket in a jam- you can even substitute any other meat (like chicken) or even just add more beans for a vegetarian version. Sometimes I like to throw in a handful or two of frozen peas in the polenta.
Sauce:
- 1 lb of sausage (or meat) I used hot Italian sausage
- 1 (28oz) can of crushed tomatoes
- water
- 2 garlic cloves, minced
- salt and pepper
- basil, fresh if you have
- Heat a sauce pot to medium high
- Add the sausage to the pot (I sliced mine into smaller pieces- this is just preference).
- Brown on both sides quickly.
- Then add the garlic, heat about one minute
- Add the tomatoes
- Fill the tomato can half way up with water and add to the pot (just eyeball it)
- Stir to combine. Bring to a boil, reduce to a simmer and partially cover. Stirring occasionally.
- Cook for about 30mins (you don't have to cook that long- just make sure the sausage are cooked all the way through!)
- Before serving season with salt, pepper and basil to taste.
Beans:
If you have canned beans- wonderful! Use two cans of cannellini beans- just open the can, drain and rinse. Top the polenta with the beans and pour hot sauce over them
If you have dry beans- you had to soak overnight, then take about 2 cups and just cover with water. Then add a big pinch of salt and bring to a boil and simmer for 30 mins (or until polenta and sauce is done). Taste a couple beans to see if they are done. Then drain and rinse quick.
Polenta:
- 4 cups of water
- 1 cup of cornmeal
- pinch of the following spices: onion powder, oregano, red pepper
- 1 tsp of salt
- 1/4 cup of parmesean cheese
- In a pot add the water and salt. Bring to a boil.
- When the water is bowling grab a whisk and super slowly add the cornmeal a little at a time, whisking consistently. This process is called "raining in" because you are adding like a light rain shower basically.
- Stir, stir, stir until it comes together- will look like grits or grainy mashed potatoes almost. When it comes together swap your whisk for a wooden spoon (wooden is traditional). Reduce heat to low and you need to stir pretty constantly (this helps break down the starches and make it yummy). I don't but stir every couple minutes so the bottom doesn't burn.
- Be careful because the polenta will turn thick and bubble and splatter a bit. So just keep an eye out. I cook for 30 minutes until smooth and creamy and it doesn't taste bitter anymore. Should taste sweet and a touch grainy.
- Right before you serve stir in your cheese.
Assembly: Polenta, top with beans, top with sausage sauce, and finally some extra parm cheese!
Tuesday, November 6, 2012
Braciole!
Before I get to all the facts about this recipe, I just want to say that my heart, thoughts, and prayers go out to everyone here in NY (and all over) that were effected by Sandy. Hopefully this recipe finds you well and lucky enough to have a home to cook it in. Maybe if you know someone that has had a loss, this would be great to make and invite them over, it's great for a lot of people, not a lot of work, and definitely warms your soul (and your tummy). No matter who or what you believe in, I think this would be a good time to take a minute before eating this meal to really be thankful for what you have, because at this moment some people have nothing. If anyone in the NYC/LI area needs a helping hand cooking or anything like that email me- I am free on the weekends. xoxo
On a lighter note, braciole is one of those dinners you cook all Sunday and is especially good for a chilly day- which we just started experiencing here in NY.
Braciole is an Italian dish, mainly thin pieces of beef rolled up and pan fried, then braised (cooked low and slow) in liquid. Serve alongside some pasta (Rigatoni is my personal fav) and a salad with some bread for all the extra sauce.
Not exactly the healthiest meal, but it is easy and can feed a lot of hungry people. This recipe takes about three hours to complete, so make sure you prep for that.
Also, since there are so few ingredients, I would definitely make the effort to use fresh herbs here. I used a roast, then sliced it myself because it was the cut of meat that was on sale this week. Try to get a cheap cut of meat, because we cook it so long that it is going to be super tender regardless.
Ingredients
- A tough cut of beef- traditionally its flank steak, but I used bottom round roast and cut into thin slices, then pounded out thin. The roast was a little over 3 lbs and made about 18 rolls.
- 1 cup of bread crumbs
- 1 handful of fresh parsley
- small handful of fresh basil
- 1/2 cup of pecorino cheese, grated
- 2 tbsp of pine nuts, toasted
- 5 cloves of garlic, minced (2 for the filling, 3 for the sauce)
- salt, pepper, olive oil
- 1 cup of red wine
- 1 (28 oz) can of crushed tomatoes
- 14 oz of water (just fill the 28 oz tomato can half way with water-good way to get all the sauce out of the cans too)
- 1 (8 0z) can of tomato sauce
- 1 red onion, chopped
- 2 small carrots, chopped
- 3 dried bay leaves
- 1 tsp of red pepper flakes
Directions
- Preheat the oven to 300 degrees F.
- Combine the bread crumbs, parsley, basil, cheese, pine nuts, and 2 garlic cloves into a bowl. Mix to combine.
- In this case, slice your beef and then pound thin (you don't have to go to crazy here, just try and cut as thin as possible and then I just pounded a bit with my hands to flatten). The last bit of beef was too small to make into slices so I just cut into small bite sizes which we'll just throw in along with the sauce. (No wasting here!)
- On each slice, top with some of our bread crumb filling and then tightly roll up and tie with some string (or toothpicks). Definitely use the string, I think it makes handling them and frying them so much easier.
- In a large deep skillet or dutch oven, put heat on high and get some olive oil hot. Season the meat with salt and pepper then fry each roll until brown on all sides (I had to do this in two batches to ensure correct browning). Don't forget to brown the little bite sized left over pieces too!
- Remove all beef and reserve. Then if pan is dry, add a bit more oil and saute the onion, carrot and 3 garlic cloves for a couple minutes until soft.
- Add the wine and deglaze the pan. Let that cook out for a minute or two. (If you don't have wine, or don't want to use it, use beef broth- but if you have the wine- SO use it- it tastes amazing)
- Then add your tomatoes- crushed and sauce. Then add the water, bay leaves and red pepper flakes. I added some salt and pepper. Stir to combine.
- Add your beef rolls back into the sauce. Bring to a simmer, cover and then put into the oven.
- Cook for one hour, then check on it- stir it. Then put back in for another hour. Check it again- if it's tender- eat it! If not, cook for another half an hour. Before serving make sure you taste the sauce to make sure it is seasoned properly.
- Just boil some pasta and serve!
Monday, September 17, 2012
Poached Egg Breakfast Sandwich
Start your day off right with a fancy looking open faced sandwich! I was inspired to make this after watching Bobby Flay make something similiar. This would be perfect for a brunch- super easy to make and filling yet not heavy.
Poaching eggs are so easy and really lends itself well to the roll it sits on.
There are lots of ways to make this sandwich, so if you want to make substitions, feel free.
Ingredients
(1 sandwich)
- 1 egg, poached
- 1/3 cup of cheese, shredded (I used parmesean)
- 2-3 tomato slices
- kaiser roll, split in half (you'll only need one half for each sandwich)
- oil, salt, pepper, red pepper flakes
- handful of arugula
- white vinegar
Directions
- To Poach Eggs: Fill a pot with water and bring to a boil. Once it comes to a boil reduce heat so it is right before a rolling boil (you want the water with basically no bubbles, just really hot). Add 2-3 tbsp of vinegar to the water. Break the egg in a small bowl first so its easy to transfer to the water. Add the egg gently to the water and swirl the water around the egg a bit so the whites form around the yolk. Cook for about 5 minutes. Remove with a slotted spoon and lay gently on a paper towel to dry off excess water.
- To assemble the sandwich: Brush or drizzle oil on the bread and season with salt and pepper. Toast under the broiler until brown and crispy. Then top with cheese- put under the broiler again to melt cheese. Lay sliced tomatoes and season with salt and pepper. Add the arugula and then gently lay the egg on top. Sprinkle with salt and pepper and red pepper flakes if you want.
- Cut a small slit in the egg and let the yolk run down all over the sandwich.
Friday, August 17, 2012
{Leftover} Ham & Spinach Quiche!
So I had a whole bunch of leftover ham (like the country "we eat only on Easter and/or Christmas" type of ham. Funny, it had that honey glaze stuff on it- so I just rinsed the ham and then froze it- now it is coming time to clean out the freezer and I had to find a recipe to make with this ham.
It took a while (like over an hour!) to cook though- but seconds to whip together. So if you want a quick make ahead recipe to tell your significant other to just pop in the oven then will be ready to eat when you get home- this is it.
Quiche is awesome because you can throw in basically anything and everything. (A fridge/freezer cleaner). I was even surprised when Brendan said it was really good- lol. I didn't think he would like it as much- but I guess you really can't go wrong with cheese and eggs.
Measurements aren't exactly on point, since I kind of just eyeballed everything. When you pour it in the baking dish and it looks like it would be a good omelet- you did it right. Hehe.
Ingredients
- 5-6 eggs
- 1 cup of cooked ham- diced
- 1-2 cups of broccoli, diced
- big handful of baby spinach, chopped
- 3 scallions, diced
- 2 garlic cloves, minced
- 1/2 cup of ricotta cheese
- 1/4-1/2 cup of another cheese (Like cheddar, pecorina, parm, - I had some feta I needed to use up)
- about 1/2 tbsp of salt
- freshly ground pepper
- 1 tsp of red pepper flakes
- 1 tsp of fresh (or dry) rosemary, thyme and parsley
- phyllo dough*
- cooking spray
Directions
- Preheat oven to 425 degrees F
- Whip the eggs in a big bowl.
- Add everything else into the bowl except the phyllo dough and cooking spray. Mix until combined.
- Spray a baking dish (I think my dish was an 8x8) with cooking spray and layer in your phyllo dough sheets (I used about 10-15 sheets). Spray each layer as you go with the spray.
- Pour in your egg mixture.
- Bake for an hour to and hour and a half until it is set. Depending on the size of your dish it could be less time. If the phyllo dough starts to get too brown (mine even burnt a bit but was still good) just lower the heat a bit.
- You know it's set by jiggling the dish- if it doesn't look like the eggs are raw you're good to go.
- Then just slice and serve! (I served with sliced Italian bread)
Wednesday, August 8, 2012
Homemade Sausage {w/ NO meat grinder}
Unfortunately I am not a proud owner of a stand mixer with a meat grinder attachment. SO I had to figure out something else.
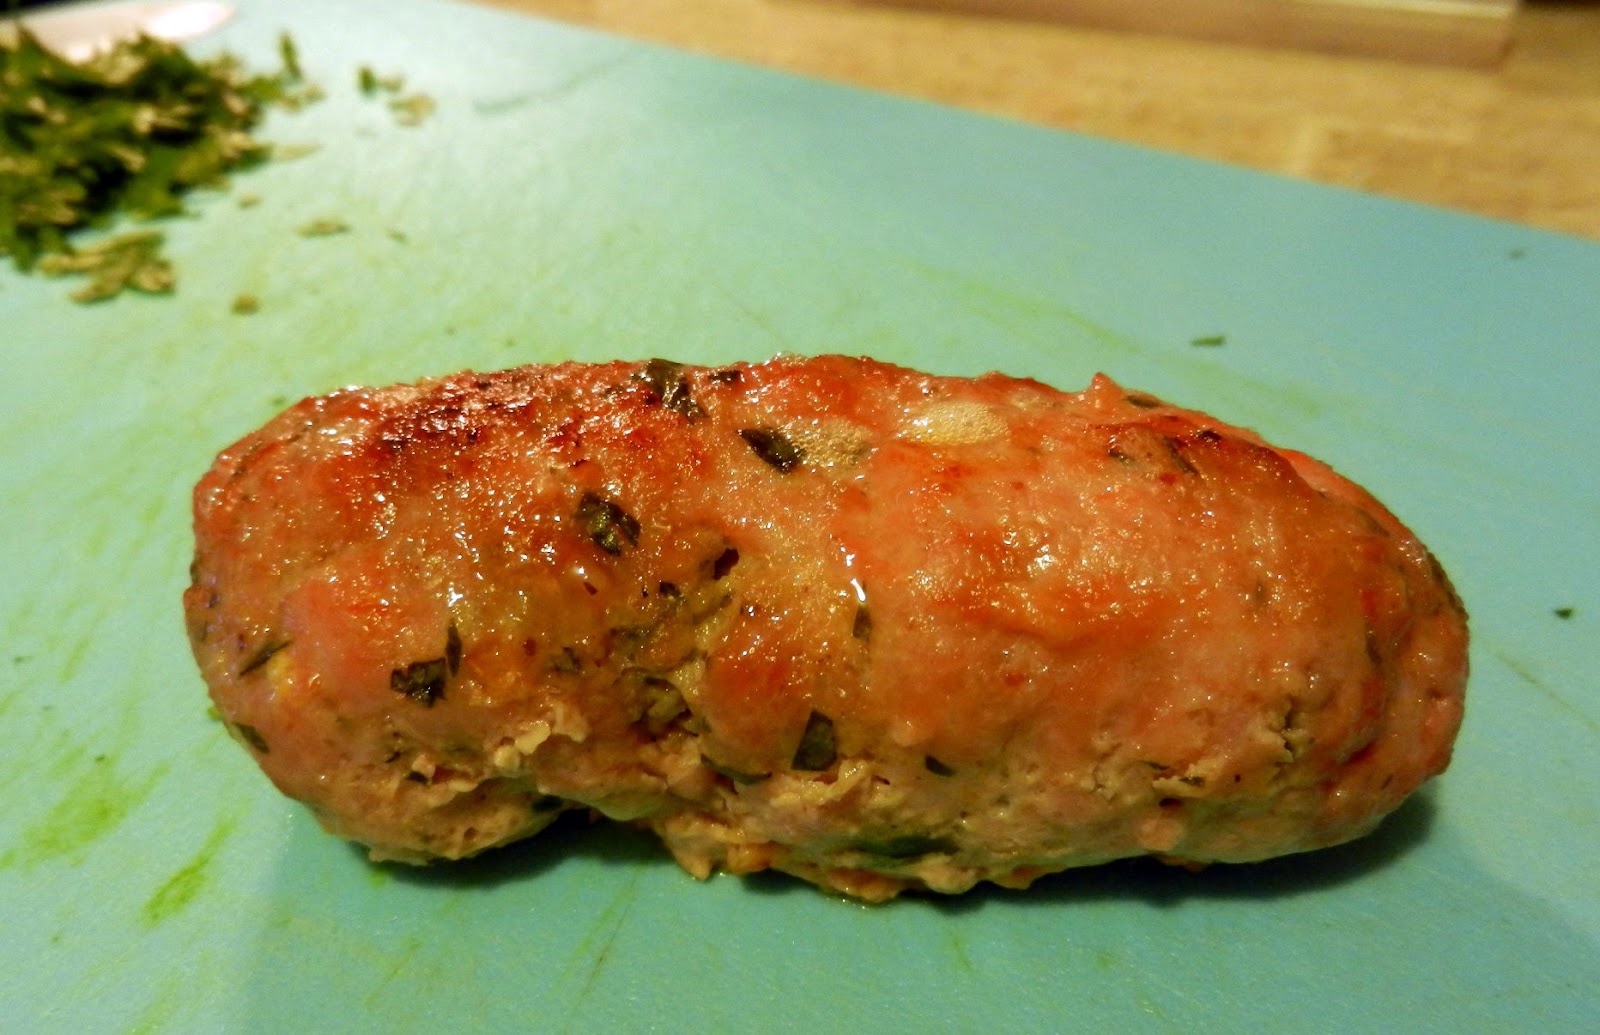
So when I buy a huge pork loin I usually cut it into three cuts myself- a roast, pork chops and "pork tenderloins". But I always have some large scraps that are still good- but are either too marbled for our taste or just separate from the larger part of the loin (ya know what I mean? it is usually a darker shade of meat). Anyway- I hate throwing away food- so I figured hey I could grind this into my own sausage, I mean, that's exactly what they do at the store- but now I know exactly what's going into it.
These sausage will have a slightly different texture because we are not using a meat grinder- but honestly these were some of the best sausages I've ever had- and you can customize them to be any flavor! even breakfast sausage! {the key here is fresh herbs}
Even the sausage connoisseur hubby gave it two thumbs up ;)
Ingredients
- about 1 lb of pork loin scraps, cut into small cubes so it's easier for the food processor
- 3 strips of fresh rosemary, chopped fine
- 2 strips of fresh thyme, chopped fine
- 1/2 cup of breadcrumbs (fresh if you have) (more if the meat feels too moist)
- 2 tsp of salt
- lots of freshly cracked pepper
- about 1/2-3/4 cup of grated cheese (I used pecorino and parm mixture)
- small pinch of ground fennel seeds (I buy these whole and crush them myself-this is what makes that signature sausage taste)
- good pinch of red pepper flakes (bc I like it spicy)
Directions
- Remove any unnecessary or larger pieces of fat from the pork scraps before cutting them into small cubes that your food processor can handle (I ground the meat in two batches)
- When it's broken up well- add to a bowl and kind of go through it with your fingers to make sure the meat is well "ground". Pikc out any larger fatty pieces that didn't grind correctly.
- Add everything else and mix together.
- Shape into sausages. Then I cook them in a glass casserole dish at 400 degrees F for about 25-30 minutes or until brown and crispy on the outside.
- You can even freeze these.
- Serve along side my Zucchini Spaghetti!
Zucchini Spaghetti w/ a Quick & Fresh Tomato Sauce
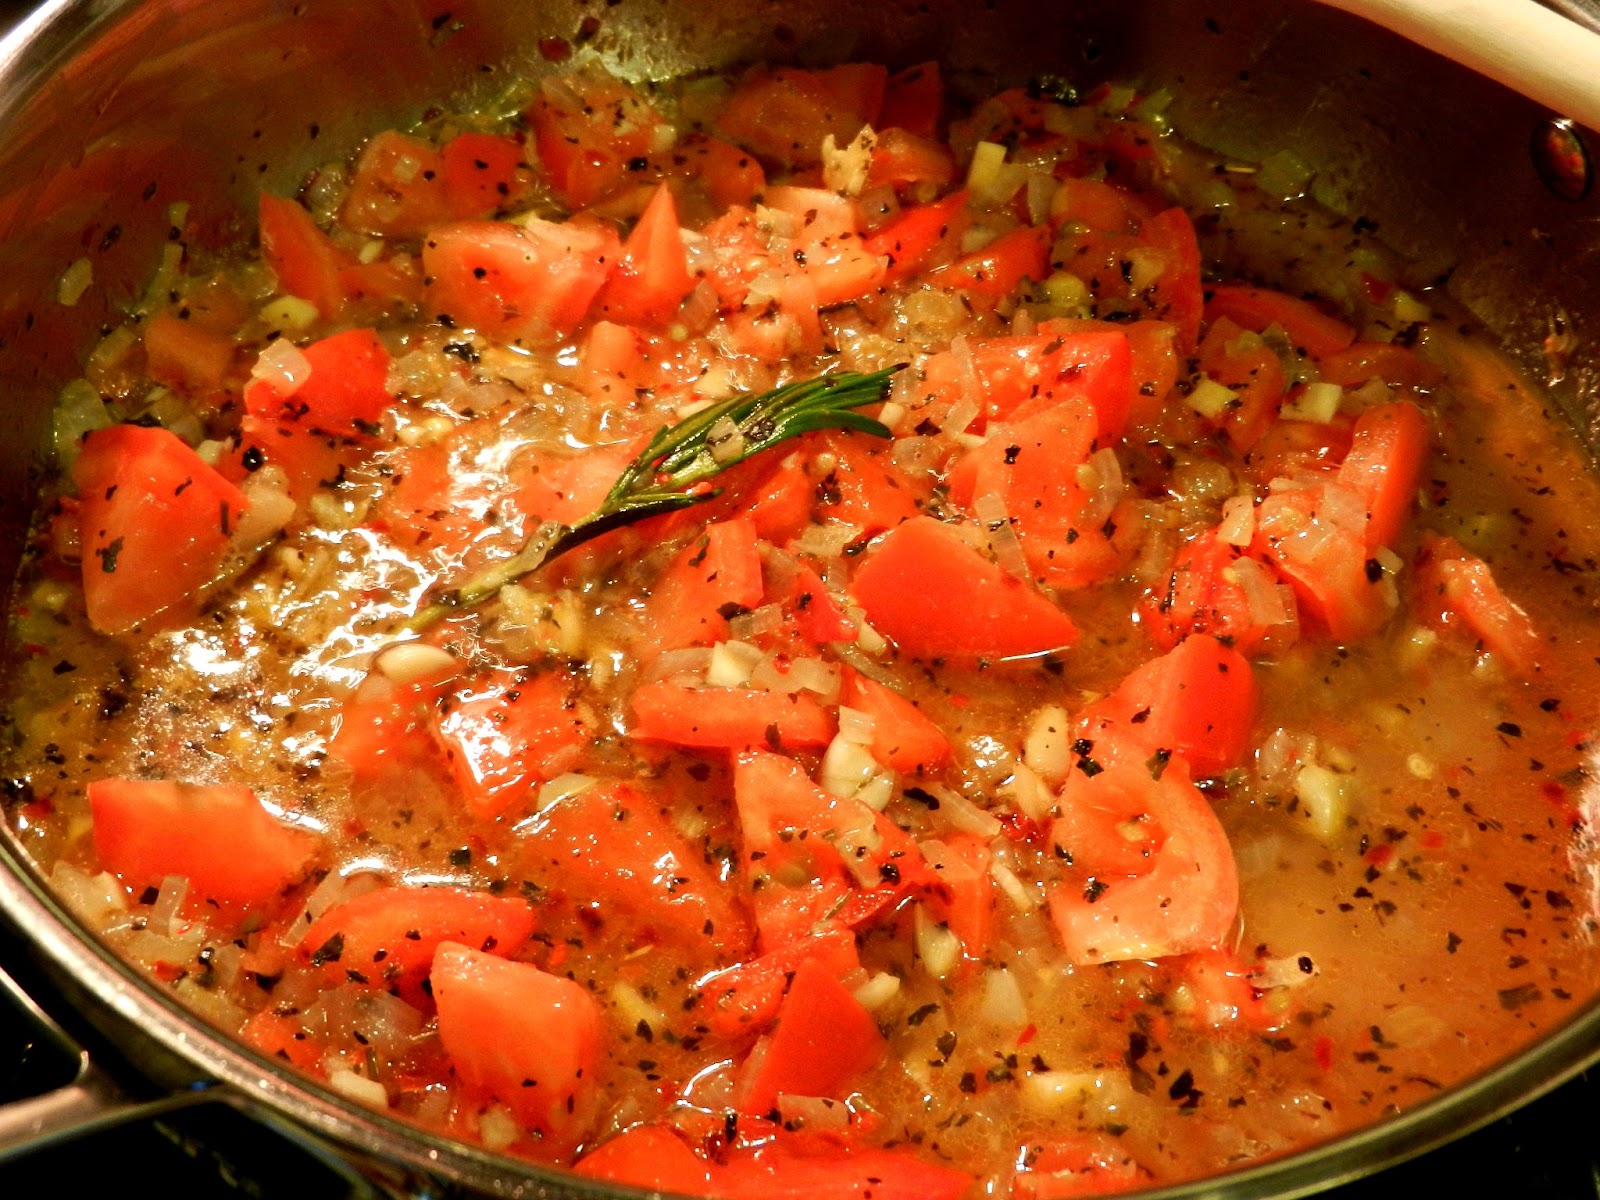
Super easy weeknight dinner that even the kids are going to have fun eating! And no one will even know its healthy! ::haha:: Serve with my Homemade Sausage.
Cut down on carbs with this dish while getting your dose of veggies. {I used whole wheat pasta for even bigger protein boost} If you can find this in your grocery store pick it up! I found this in my pre-packaged produce section. How cute is this package of zucchini!?
Sauce is super simple and takes minutes to come together- all you're waiting for is the pasta water to boil!
Ingredients
- 1/2 lb of whole wheat spaghetti (yes! only 1/2 the box in necessary!)
- about 1 lb of shredded-into-strings zucchini
- 1 small onion, diced small
- 2-3 cloves of garlic, minced
- 2-3 plum tomatoes, diced
- 1/2 cup of water
- 2 tbsp of olive oil
- 1 tsp of salt (or more to taste)
- 1 tbsp of dried basil
- pinch of red pepper flakes
Directions
- Get the water on to boil for the pasta.
- In a large sauce pot or skillet (bc when the pasta is done we will toss in with the sauce- need some room to toss) over medium heat add the oil.
- When the oil is hot add the onion and saute until soft (about 5-7 minutes). Then add the garlic, saute for a minute or so.
- Then add your tomatoes- cook for a minute or so- I like to squish them a bit in the pan so they release some juices.
- Then add your spices. Cook for a minute.
- Then add the water. Bring to a simmer and keep on a low simmer until ready to serve.
- (In the picture I used a small branch of rosemary too, bc I had rosemary in the sausage- but this is totally optional)
- When the pasta is al dente add it to the sauce pot along with your zucchini and toss until warmed through and zucchini is soft (zucchini is cut so thin it cooked in a minute or so)
- Serve topped with some parsley and grated romano!
Thursday, August 2, 2012
{No Skillet} Baked Ziti & Catering 101
So last Saturday I helped my Aunt with my cousin's graduation party. I made 1 full tray of eggplant rollatini, pulled pork, assorted roasted veggies, tex mex rice, and 5 full trays of baked ziti. She cooked dishes like chicken, bacon mac and cheese, penne ala vodka etc. So we definitely had a nice spread.
I love cooking and my family -so what better way to tie it all in as to help cater a party. Unfortunately because of the rain the turn out wasn't as many as expected, but we still had a lot of people come- maybe 100 including kids. I really hope to take this catering business further because I had a lot of fun with it.
It is definitely some sort of art to prepare what I did in a kitchen so small with one oven. Oh, and did I mention I have never made eggplant rollatini before. It came out really good!{Thank God!} I took this challenge on full force and bought wayyyy too much food (thank god for returns) and spilled some food in my trunk- gross (thank god for carpet cleaner). But overall it went great.
I also misread my Aunt's message and made WAY too much ziti- so here's a quick and easy recipe for baked ziti- because if I can make 5 full trays in one night, you can make some for your family for dinner :)
Oh, also baked ziti is supposedly traditionally made without ricotta cheese- but who wouldn't want ricotta cheese!? This is also a non-meat version- if you wanted to add meat- you would have to use a skillet ;) And of course this isn't one of my healthier meals- but you can use part skim ricotta and mozzarella, plus whole wheat pasta for a "lighter" version- maybe swap some pasta for some veggies.
Ingredients
I also apologize for no picture :( As you can see after I made all this food, I was just happy I was able to finish it all in time. Yea, 18 of those bad boys.
If anyone in the Long Island, NYC area is interested contact me at bstarcatering@gmail.com
I love cooking and my family -so what better way to tie it all in as to help cater a party. Unfortunately because of the rain the turn out wasn't as many as expected, but we still had a lot of people come- maybe 100 including kids. I really hope to take this catering business further because I had a lot of fun with it.
It is definitely some sort of art to prepare what I did in a kitchen so small with one oven. Oh, and did I mention I have never made eggplant rollatini before. It came out really good!{Thank God!} I took this challenge on full force and bought wayyyy too much food (thank god for returns) and spilled some food in my trunk- gross (thank god for carpet cleaner). But overall it went great.
I also misread my Aunt's message and made WAY too much ziti- so here's a quick and easy recipe for baked ziti- because if I can make 5 full trays in one night, you can make some for your family for dinner :)
Oh, also baked ziti is supposedly traditionally made without ricotta cheese- but who wouldn't want ricotta cheese!? This is also a non-meat version- if you wanted to add meat- you would have to use a skillet ;) And of course this isn't one of my healthier meals- but you can use part skim ricotta and mozzarella, plus whole wheat pasta for a "lighter" version- maybe swap some pasta for some veggies.
Ingredients
(I usually use a 9x13 casserole dish with this recipe)
- Olive oil
- 28 oz can of crushed tomatoes
- 1 onion, chopped
- 3 garlic cloves minced
- 1 tablespoon of dried basil
- 1 tablespoon of dried oregano
- 1 tsp of red pepper flakes (or more if you like it spicy)
- 1 cup of ricotta cheese (I usually use part skim)
- 1 lb of ziti (or you could use rigatoni or penne or any tubular pasta you have on hand)
- 1/2 cup or so of mozzarella cheese for the topping
- Preheat your oven to 400 degrees F
- Get your pasta water on to boil.
- In a small sauce pan- saute your onion in about 2 tbs of olive oil on medium. After they get soft about 5 to 7 minutes add your garlic and saute about 2 minutes.
- Then add your tomatoes to onion and garlic. Add your spices and stir to combine. (I like to add a bit of water to the sauce to make it a bit thinner- but this a personal preference)
- Bring the sauce to a boil, then reduce to a simmer- let simmer until your ready to assemble.
- When the pasta water is boiling, add your pasta and cook to al dente (because it will continue to cook in the oven)
- Get your casserole dish and add the sauce and ricotta cheese to it and mix to combine (I don't get crazy with mixing- it will all combine well when baking)
- When pasta is done add your pasta to the casserole dish and carefully toss the pasta (so no overflow) with the sauce and cheese.
- When that is done top the pasta with mozzarella cheese (If I have sometimes I like to use parmesean and mozzarella). Cover with tinfoil and bake for 30 minutes.
- Serve and enjoy! Suggestion: serve with salad.
I also apologize for no picture :( As you can see after I made all this food, I was just happy I was able to finish it all in time. Yea, 18 of those bad boys.
If anyone in the Long Island, NYC area is interested contact me at bstarcatering@gmail.com
Wednesday, July 18, 2012
Italian Chicken Foil Packets
I usually have a lot to say about what I make - but not these- these were just AMAZING. Period. Easy and healthy too- you can't go wrong- try them out tonight or at your next camping trip or cook out. You will NOT be sorry.
I know it's not the prettiest picture- but hey- we were roughing it ;)
This made four good sized packets.
Ingredients
- 3 boneless skinless chicken breasts, cubed
- 1 red onion, quartered
- 3-4 plum tomatoes, quartered
- 2 garlic cloves, minced
- salt, pepper, red pepper flakes, oregano, basil
- extra virgin olive oil
- tinfoil
- You will need to triple layer the tinfoil packets- so each packet with be three layers thick of tinfoil.
- So size out three fairly big tinfoil sheets and layer them up. In the middle of the sheet put 1/4 of the chicken, onion, tomatoes and garlic.
- The spices listed were what I used- so about a pinch on each packet.
- Drizzle it all with a little olive oil.
- Then take the end closest to you and farthest from you and pull up like a tent. Fold/crimp and roll together the ends to create a seal and continue to roll them down until you reach the chicken. Then take the ends on the right and left and seal/crimp- then roll up like the first time. Here's an idea of what they would look like.
- Cook for about 30 minutes on a medium grill. I rotate my packets to the size with more heat then the side with lower heat. Keep the lid closed too.
- When they are done, be careful because they will obviously be hot and steam will escape when opened. I actually had forgotten how long they were cooking so I just opened one up to check if they were done- if it isn't pink you're good.
- Just unwrap the packet and go to town with a fork! I served with large store bought garlic knots.
Wednesday, June 13, 2012
Weeknight Pasta w/ Simple Garlic & Oil Sauce
So after work I usually hit the gym and by the time I get home it is kind of late to be eating dinner- especially since the soon-to-be hubs has to wake up at 5am for work. So this is a quick pantry made pasta dinner that you can either eat by itself or through in some chicken to round the mean out with some more protein.
This recipe is as easy as boiling water and heating up some garlic but with a couple extras thrown in- it was SUPER delicious- and when I say super- yea, I mean it. Super like Brendan had three servings. Yea, as I said, super delicious. But yet super simple! Impressive and delicious. Boom.
*Now, when you are reading the directions this ingredient might freak you out. But stop being such a wussy! Have you ever even tried anchovies? (For all the people that said "yes, on a pizza"- you don't count because that is probably the worst way people know it and obviously get turned off by it.) So in a different question- have you ever cooked with anchovies? Believe me, I guarantee you, you will not even taste them. It will not taste fishy. When anchovies are heated, especially in oil they dissolve and disappear into the oil and just become a flavor- sort of like a salty nutty flavor. It adds so much depth of flavor into this sauce. You really don't want to skip it; it's the secret ingredient that makes it special, but still an easy weeknighter recipe. I told Brendan they were in it and he said "ew"- then he had three servings.
But for all the haters and wussies out there- if you must substitute I guess you could use a couple dashes of Worcestershire sauce (which anchovies are one of the ingredients in that sauce, so if you've used it before- you've had anchovies).
Ingredients
- 1 lb of pasta of your choice (I chose whole wheat rotini)
- about two cups of broccoli (I had some in the freezer)
- 1/4 cup of oil (I used extra virgin, you could also use regular olive)
- 4 garlic cloves, grated or minced
- 4 anchovy fillets*
- 1 lemon, zest and juice
- 1 tbsp of red pepper flakes (yes, this is a lot- if you want less spice start with a heavy tsp)
- pinch of salt (bc anchovies and cheese will add salt)
- freshly cracked pepper
- 3/4-1 cup of pasta water (so remember don't dump it before reserving a cup)
- 1 cup of pecorino or parm, shredded or grated
Directions
- Boil water for the pasta.
- If you have frozen broccoli- defrost in the microwave. If fresh we will wait to blanch in pasta water at the end.
- Heat a sauce pot over medium low heat and add the oil, garlic and anchovies. You can add the anchovies whole, they will eventually just dissolve into the hot oil. Do not let this burn, just gently bubble and heat up for a couple minutes so the oil gets flavored.
- After the anchovies "disappear" and the garlic slightly golden. Turn the heat to low and add the lemon juice and zest along with the red pepper flake, salt and pepper.
- Keep on low heat for flavors to marry for about 5 minutes.
- Meanwhile when water boils, salt the water and drop your pasta. I semi-defrosted my frozen broccoli, so about 2 minutes before the pasta was done I added the broccoli to the boiling water. If you are using fresh you would do the same- drop into boiling water just a couple minutes before the pasta is done.
- RESERVE your pasta water! Add it to the sauce pot and mix to combine.
- Drain pasta and broccoli and add to a large boil for mixing. Then top and toss with your sauce.
- Top with shredded cheese and serve! You can also add a bit of cheese and toss with pasta to add more body to the sauce.
Thursday, June 7, 2012
Lemon Basil Penne
Oh this was so good. Simple to make too. Serve along side some thin grilled cutlets for a quick weeknight meal!
- 3 lemons, juice (and zest of 2)
- 1 cup of cheese- I used pecorino, but you could use parm or even mozzarella
- 2 garlic cloves, minced
- 2 tbsp of butter (I used I can't believe it's not butter)
- 1/2 cup of low fat milk (I used 1%)
- 1 tsp of cornstarch
- about 1 lb of asparagus
- about 20 basil leaves, chiffonade (aka cut into ribbons)*
- salt and pepper
- 1 lb box of penne pasta (using whole wheat is even better!)
- Get water boiling for your pasta.
- In a small sauce pot add the butter and the garlic. Cook that on low for a couple minutes to let the butter infuse with the garlic flavor.
- Then add the lemon juice and zest. (Note: the garlic may turn green/blueish color- don't worry it is just reacting to the acid in the juice)
- Side note: Never let this sauce come to a boil
- While the lemon juice is heating through add the tsp of cornstarch to your low fat milk- if you are using cream or whole milk this step is unnecessary. Stir until combined and then add to the pot while whisking.
- Quickly add the cheese and whisk until combined. Taste it- see if you want to add more salt, add pepper if desired. When that is all heated through and a creamy sauce consistency, turn off the heat and cover to keep warm.
- When the water boils add salt and then your pasta.
- Cut your asparagus into short pieces, similar to the size of the penne. When the pasta is almost done add the asparagus to the water and let the pasta and asparagus finishing cooking together.
- Drain pasta/asparagus and add to a large serving bowl. Pour the sauce on top and add basil- mix until everything is combined.
- You can add a bit of extra virgin olive oil and more cheese on top if desired.
Friday, June 1, 2012
Hummus
Totally had a hummus craving. Luckily for me I have about 100 cans of chick peas in my pantry for some reason. My girl Dee just posted her recipe up on her new blog Deeliciously Healthy Eats so feel free to check that out too for more inside tips, tricks and pointers about hummus and how to make it. I also promised my sister's bff that I would post this for her. (Don't worry Maria next time I will bring hummus for you).
Hummus is an amazing snack in moderation because it is high in fat- boo. (Vanessa: Sorry, you are right, I forgot to mention that they are good fats like in avocados and such) You can customize hummus in many different ways too- toss in roasted red peppers, spinach, salsa, chipolte, cayenne and the list goes on. I actually grated up some seedless cucumber and added it. So fresh and delicious.
Ingredients
- 5 tsp of tahini paste (this is ground up sesame seeds, look for it in Asian markets or in the international food aisle. I have also spotted this where the jellys or nuts are sometimes)
- 1 can of chick peas (aka garbanzo beans), drained and rinsed
- 1 lemon, juice and zest
- 2 tsp of salt
- 2 garlic cloves, grated
- 1/2-1/4 cup of water
- extra virgin olive oil (for garnish)
- In a food processor or blender add everything except the water. Buzz it up until it breaks down a bit. Add 1/4 cup of water to start. Check consistency and taste. Thinner just add more water. The consistency will vary depending on how much lemon juice the lemon gave you or other flavor ingredients you used. You can eat right away or leave in the fridge to let the flavors marry a bit more. You can garnish by drizzling the top with a bit of oil, but that is up to you.
Wednesday, May 23, 2012
Pearl Barley Summer Salad
Definitely serve this over my Grilled Chicken w/ Creamy Roasted Red Pepper Garlic Sauce. If you have never tried pearl barley- you should- it is one of my favorite grains (low in fat and pretty high in fiber). It is like a puffier piece of rice; delicious cold or hot- in soups or salads. I made an in-between version which is hot barley over cold crisp vegetables tossed with a vinaigrette. The hot barley soaks up the vinaigrette, then the crunch of the veggies and oh soooo goood!
I was on a clean-out-and-use-up-everything-in-the-fridge spree this week because we are going to motorcycle track this weekend (super excited! pics to follow!) Anyway, basically you can swap out any veggies you have lying around in the fridge. Just cut them all into similar bite sized pieces. Also you can use whatever nuts you have lying around- almonds or walnuts would be good here too. This salad is good for picnics because it is in a vinaigrette and can be left out.
Ingredients
- 1 cup of uncooked pearl barley, 2 1/2 cups of water, 1 tsp of salt
- 1/2 cucumber, diced
- 1 pepper, diced (I used a yellow one)
- 1 shallot, minced
- 1 handful of parsley, chopped
- 2 small carrots, diced
- 1 ear of corn, kernels taken off (about a 1/2-3/4 cup of frozen if you don't have fresh)
- 3 tbsp of pine nuts, toasted*
- 1/4 cup of lime or lemon juice (if you don't get that much out of 1 lime or lemon just add a splash of vinegar)
- a little less than 1/4 cup of extra virgin olive oil
- pinch of salt and pepper
- Cook the pearl barley according to directions (the first bullet lists what I used). Bring water to a boil and cook barley on low for about 30-45 minutes.
- Meanwhile prep all your veggies, herbs and nuts and add to a large bowl.
- In a smaller bowl add the citrus juice, oil and salt and pepper and whisk up.
- When the barley is done mix with veggies. Then pour vinaigrette over everything and stir until combined. Serve alone or over my Grilled Chicken w/ Creamy Roasted Red Pepper Garlic Sauce.
*If you buy raw nuts, just put them in a dry skillet and heat on medium. They will toast up in the skillet- but ALWAYS keep an eye on the them and shake the pan frequently, you don't want them to burn. Should only take about 5 minutes or so.
Grilled Chicken w/ Creamy Roasted Red Pepper Garlic Sauce
Super excited for this weekend! The future hubby and I are driving down to West Virginia to the Summit Point Motorsports Park for our first track day together of the year! Going for the whole weekend means a lot of food prep and BBQ'n! This week has been a clean out the fridge week because we will be gone close to five days or so. First one was the Shredded BBQ Chicken Sandwiches, then I made a rice, chicken and veggie casserole topped with cheddar cheese, and now this (plus the pearl barley summer salad)!
Will try and have a good portion of the weekend documented- for easy portable grill recipes and just so you guys can see what we do on our free time lol.
Not only is this recipe super easy AND healthy but it's basically a no cooking involved one. Perfect for those hot summer days/nights.
For the chicken I just season boneless skinless chicken breasts with some salt and pepper and throw on the grill, here's the sauce you top it off with (which is a no cook)
Ingredients
- 3/4 cup of non fat plain yogurt
- 1 roasted red pepper
- 1 garlic clove, grated or pasted
- pinch of fresh thyme
- pinch of lime or lemon zest (if making the pearl barley salad too you use the juice of this there)
- 1 tsp of salt
- 1 tsp of red pepper flake
- freshly cracked pepper
- Put everything into a blender or food processor and blend until smooth.
- If too thick add a splash of milk, water, or citrus juice.
- If too thin add more yogurt.
- Serve over grilled chicken and alongside the Pearl Barley Summer Salad.
Labels:
chicken,
creamy,
easy,
garlic,
grilled,
healthy,
non fat plain yogurt,
red pepper,
roasted
Wednesday, May 16, 2012
Shredded BBQ Chicken Sandwiches (Leftover Weeknight Meal)
So I'm sure we all have "leftover night" one day a week or so. On Sunday we came home from grandmas with a rotisserie chicken, a tray full of Spanish rice, and I had some corn and grilled chicken left over from a previous BBQ of my own. Some people say they are bad when it comes to opening the fridge, seeing what's there and making a meal- for me this is a welcomed challenge. This one was not as difficult because of the similar flavor profiles of these separate dishes.
Any leftover chicken is an awesome thing to have, it can become so many things. The rice was obviously a side and so was the grilled corn on its own. Starch, veggie, done.
I had three leftover kaiser rolls (but tortillas or really any hearty bread would have worked here too), chicken and a pantry/fridge door. Hand shred the left over chicken, obviously removing the skin and bones. Set that aside while you make your sauce. Everything else gets microwaved to just reheat!
I have to say I don't have a set BBQ sauce recipe, it changes I think every time I make it, but this was the one I made last night. I used an immersion blender to make the sauce thicker, quicker, and to make it smooth- but if you don't have one you can always carefully transfer to a regular blender, food processor or just leave chunky and simmer longer to thicken.
Ingredients
- 1 onion, chopped
- 2 garlic cloves, minced
- 1 jalapeno, minced
- 1 roasted red pepper, chopped
- 1 lime, juiced
- 1 1/2 cup of chicken stock
- 1 (8oz) can of tomato sauce
- 2 tbsp of brown sugar
- 2 tbsp of worchestire sauce
- 3 tbsp of apple cider vinegar
- 1 tbsp of salt
- freshly cracked pepper
- about 2-3 cups of shredded cooked chicken (or pork!)
Directions
- In a sauce pot add about a tbsp of oil and then saute the onion, garlic, and jalapeno until softened. About 5-7 minutes- careful not to burn it. Then add the roasted red pepper.
- Then add the lime juice, chicken stock and tomato sauce. Try to scrape any bits off the bottom of the pan- if there are any.
- Add the sugar, vinegar, worchestire sauce, salt and pepper.
- Bring to a boil then reduce to a simmer.
- This would be the time to blend. After blending keep at a simmer until sauce like consistency then add in your chicken and heat through.
- If not blending, keep at a low boil until thickened to your liking (ALWAYS taste the sauce before adding the meat or serving) and then add the chicken.
- Pile the chicken on toasted buns with pickled jalapenos, tomatoes and lettuce.
Now if you don't have already cooked chicken, don't worry- just poach your chicken first then use the poaching liquid as your chicken stock. Add chicken to pot, cover with water until almost fully submerged. Bring to a boil then immediately reduce to a low simmer. Cook until done. Remove chicken and the water it cooked in is now essentially chicken broth- use for your sauce!
Thursday, May 10, 2012
Mayo Crusted Chicken
This recipe is easy to manipulate to other serving sizes- just remember 1 tbsp of mayo per breast.
Ingredients
- 3 chicken breasts
- 3 tbsp of mayo
- 1 tbsp of fresh thyme
- salt and pepper
- red pepper flakes
- 1/2 cup of panko bread crumbs
Directions
- Preheat your oven to 450 degrees F
- Lay out your chicken on a cooking sheet sprayed with cooking spray.
- In a small bowl combine the mayo and spices.
- Each chicken breast gets one tbsp of mayo- spread out over the top of each chicken breast.
- Sprinkle and coat the mayo with bread crumbs.
- Bake until golden on top and cooked through -about 25-35 minutes.
| Before the oven |
Friday, May 4, 2012
Chicken, Cheddar and Broccoli Pinwheels

Ingredients
- 1 batch of home made pizza dough (or store bought)
- 2 boneless skinless chicken breasts, diced into small bite sized pieces
- 2 heads of broccoli crowns, cut into small florets
- about 1-2 cups of shredded cheddar cheese (depending on how cheesy you like it)
- salt, pepper and red pepper flakes
- 1 lemon, juice and zest
- Preheat your oven it 450 degrees F
- In a skillet heat some oil on high and cook off the chicken just until it isn't pink (try to not cook it all the way through because it will finish cooking in the oven). Season with salt and pepper and red pepper flakes
- During the last minute or so throw in the broccoli and season with more salt and pepper and then add the lemon juice and zest. Turn off the heat and then set aside until it is cool enough to handle.
- Sprinkle your working surface with flour and roll out your pizza dough into a large rectangle. (I also didn't use the entire batch of homemade dough- just throw left over dough in a ziplock and put in the fridge for next time) I rolled mine roughly into a size about a foot high and foot and a half long.
- Sprinkle the dough with your cheese. Then spread out the chicken and broccoli- try to shake off any excess liquid before placing on the dough.
- Put some flour on your hands and carefully start to fold over the edge closest to you onto itself- aka you are rolling up the dough now into a log shape.
- Once it is all rolled up cut into about 2 inch slices. Gently squish together a bit to keep the shape and place on a baking sheet lined with foil and sprayed with cooking spray.
- This makes about 10 pinwheels.
- I like to drizzle and rub each one with a touch of oil before baking for about 15 minutes.
Monday, April 9, 2012
Spicy Southwest Deviled Eggs
So here is what you do with all those left over Easter eggs (or you can throw them into salads which is one of my favs too). I've tried a lot of different versions of deviled eggs and haven't had a bad egg yet (haha). Deviled eggs are awesome because as long as you make the perfect hard boiled egg- you can do whatever you want with the rest!
Perfect Hard Boiled Eggs:
Take cold eggs and cover with cold water in a pot. Cover the pot and bring up to a boil. As soon as it comes to a boil, shut off the heat and let sit covered for 10 mins. Then carefully remove the eggs and let sit in cold water until cool enough to handle, then either refrigerate or peel and eat!
Perfect eggs every time, with no gross grey lining in the yolk!
This recipe I went for a lighter version, but used big flavors so you wouldn't notice the lack of yolks or mayo traditionally used. This recipe can be doubled for a larger crowd, but this worked very well for 10 people.
Ingredients
- 8 hard boiled eggs, sliced in half long ways and yolks removed and reserved
- 10 yolks (which is really 10 halves of yolks), or 5 whole yolks
- 2 tbsp of low fat mayo
- 1 tsp of prepared horseradish
- 1 tbsp of mustard (whatever you have, yellow, dijon, whole grain etc)
- 2 tbsp of roasted red pepper, chopped fine
- 2 tbsp of pickled jalapenos, chopped fine
- 1/4 cup of non fat plain yogurt
- 1 big pinch of salt (can adjust to your taste later)
- fresh cracked pepper
- a pinch (about 1/2 tsp) of garlic powder
- ground chipolte powder- sprinkle a pinch on each egg for garnish
- I also garnished with slices of jalapenos, roasted red pepper and parsley leaves (cilantro would have been nice here too)
- After you make the hard boiled eggs and split them in half length wise, remove the yolks and set aside.
- Add 10 yolk halves to a bowl with the rest of the ingredients, except the garnish pieces and chipolte powder.
- Combine until smooth. Taste and see if it needs more salt- adjust to your liking.
- Put yolk mixture in a small ziplock bag and cut off the tip to make a piping bag. Pipe the mixture back into the hollowed out egg whites.
- Sprinkle a small pinch of chipolte powder in each egg and garnish to your liking.
- Refrigerate up to a day or serve right away.
Tuesday, April 3, 2012
Sweet Tater Tots and Kale Chips
I had some left over sweet potatoes and kale- and this was born! I have made kale chips before and they are so good! Kale is awesome, if you haven't tried it, you should. It's like spinach but can withstand more heat basically and still maintain its integrity. So good just lightly crisped up in a skillet or baked as chips. I would suggest don't let them go too far- because otherwise it kind of tastes like you are eating air.
And these tater tots were awesome, I kind of made up my own recipe for these and was hoping they came out good! And thank god they did because I will definitely be making these again.
Kale Chips
- A bunch of kale, stripped from the stem, washed and dried and cut/pulled into bite sized pieces
- salt, pepper, and cooking spray
Directions
- Oven preheat to 475 degrees F
- On a baking sheet or wire cooling rack arrange the kale pieces
- Spray with spray and sprinkle with salt and pepper
- Put in the oven for 5-10 minutes- you want the leaves to be wilted and just a bit brown and crispy on the edges. Try no to let them cook too much.
| new salad spinner too! |
Sweet Tater Tots
Ingredients
- 2 sweet potatoes
- 1 regular baking potato
- 1 tsp of garlic powder
- 1 tsp of salt
- freshly ground pepper to taste
- pinch of celery seed (optional)
- about 2 cups of panko bread crumbs
- cooking spray
Directions
- Oven should already be at 475 degrees for the kale chips (and almond crusted chicken, if you made that too)
- In the microwave, in a microwave safe container put all the potatoes peeled and stabbed a couple times with a fork in and press the "potato" option (should be about 10 minutes)
- Meanwhile in a food processor (or you could just do this in a mixing bowl) add the spices.
- In another shallow dish add the bread crumbs (I added them a cup at a time)
- When the potatoes are done combine them with the spices and taste to make sure they taste good. Adjust spices to your preference.
- When they are cool enough to handle, take a ziplock bag and fill with some of the mixture. Snip the corner to make it into a piping bag.
- Pipe out small (tater tot size) pieces into the bread crumbs, a couple at a time. They kind of look like baby carrots. Try not to make them too big.
- YOU MUST HANDLE THESE VERY GENTLY. They are super soft so gently pick up and roll in your hand a bit to get off excess crumbs.
- Line a baking sheet with foil and spray with spray. Line up your tots and then when they are all done spray again with spray.
- Pop in the oven for about 15-20 minutes until they are golden and crispy.
- In hindsight I would flip them half way throw cooking so they are nice and brown on both sides.
- This made all these in the picture with about 1/2 cup of potato filling left over- I just let my fiance eat the rest lol
Labels:
chips,
easy,
healthy,
kale,
panko,
potato,
sidedish,
sweet potato,
tater tots
Subscribe to:
Posts (Atom)